Enclosure Installation
Items Required
- Dronetag BS unit
- Enclosure
- Selected antennas
- M1 3mm Philips head screw
- Philips head screwdriver
These instructions must be meticulously followed to ensure a successful BS installation. Any deviation from these instructions could result in improper insulation, equipment damage, or safety risks. Always prioritize safety during the installation process.
Procedure
** 1. Antenna Installation**
Based on the type of antennas you plan to install, there are two ways how to put the device into the enclosure. Please identify whether you plan to use the device with wire antennas (follow 1.1) or other type of antennas (follow 1.2) and procced accordingly below. For U.FL connector handling, please get familiar with this guide before you start the installation.
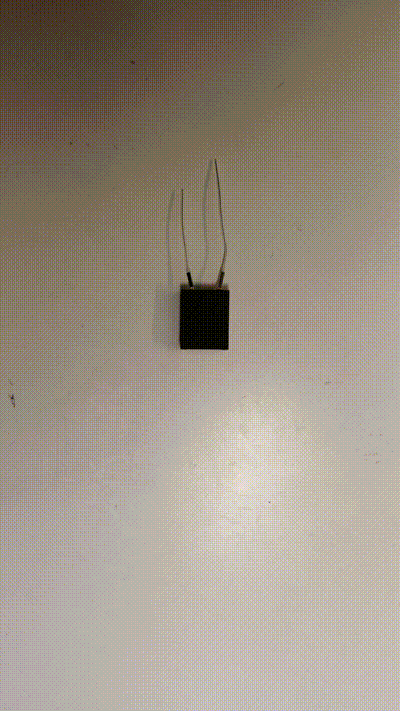
** 1.1. BS with Wire Antennas** Attach the wire antennas to the BS unit following the provided instructions. Ensure a secure attachment by listening for a click sound.
- Ensure that you orient the antennas correctly, ensuring that the GNSS antenna and the Bluetooth antenna align with the appropriate connectors on the BS unit.
- If you are using wire antennas, the shorter one with black isolation is for Bluetooth Remote ID and the longer one with gray isolation is for GNSS positioning.
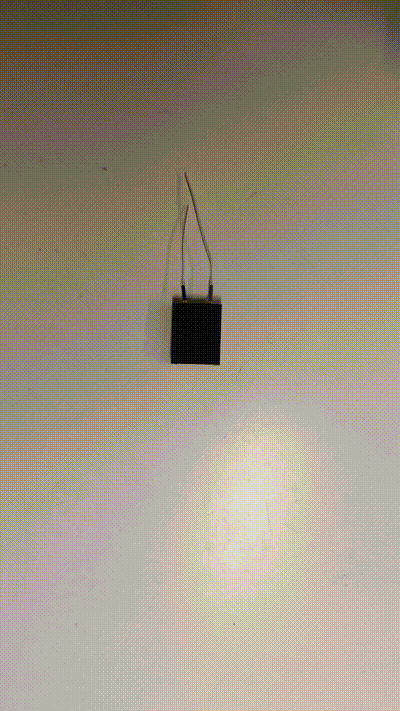
Slide the BS unit with the installed wire antennas into the enclosure. Guide the wire antennas through the designated holes in the enclosure, allowing them to extend outside. Ensure that the BS unit is securely positioned within the enclosure and correctly inserted into the designated socket.
If you have hard time sliding the Dronetag BS board inside the enclosure, you can either sand its sides little bit or use heatgun at 60° C to preheat the enclosure so it softens a little. Never use temperature over 60° C as it can meltdown. If you need to remove the board when you are in the middle of the process, please follow the board removel guide below.
** 1.2. Other Antennas Installation**
Wire the disconnected U.FL antenna connectors through the enclosure. Attach the antennas to the BS unit as instructed and confirm a secure connection by listening for the click sound.
- Ensure that you orient the antennas correctly, ensuring that the GNSS antenna and the Bluetooth antenna align with the appropriate connectors on the BS unit.
- If you are using copper tube antennas, the shorter one with black isolation is for Bluetooth Remote ID and the longer one with gray isolation is for GNSS positioning.
Slide the BS unit with the installed antennas into the enclosure. Guide the wire antennas through the designated holes in the enclosure, allowing them to extend outside.
- If you have hard time sliding the Dronetag BS board inside the enclosure, you can either sand its sides little bit or use heatgun at 60° C to preheat the enclosure so it softens a little. Never use temperature over 60° C as it can meltdown.
- If you need to remove the board when you are in the middle of the process, please follow the board removel guide below.
** 3. Back Cover Installation**
- Ensure that the BS unit is securely positioned within the enclosure and correctly inserted into the designated socket. Attach the back cover of the enclosure using the provided screw. Tighten the screw into the hole located at the bottom of the enclosure.
Never use any other screw then supplied M1 x 3 mm length. If you happen to loose this one, you must find replacement with exact same parameters. When using longer screw, you will damage the board and void the warranty.
** 4. Final Check** Perform a visual inspection to verify the following:
- The BS unit is securely inserted within the enclosure.
- Antennas are correctly positioned, and U.FL connectors are securely connected.
- Battery connectors remain accessible for use.
8. Usage Once you have confirmed the secure installation of the BS unit and antennas, you can use the assembly as intended.
How to Remove Dronetag BS from the Enclosure
- The use of tweezers and a heat gun, if not executed with precision, can lead to severe damage. Tampering with internal components may void your warranty and result in irreparable harm to your device. Ensure the BS is disconnected from the power source before proceeding with any of these steps. Performing these actions while the power source is active may result in injury!
- Constantly bear in mind that the use of tweezers involves direct contact with printed circuit boards, posing a risk of damage. Additionally, exercise meticulous temperature control when employing a heat gun. Ensure the temperature never surpasses 60 degrees Celsius under any circumstances, and avoid prolonged exposure to hot air. This precautionary measure is crucial to prevent both your device and its packaging from melting during the process.
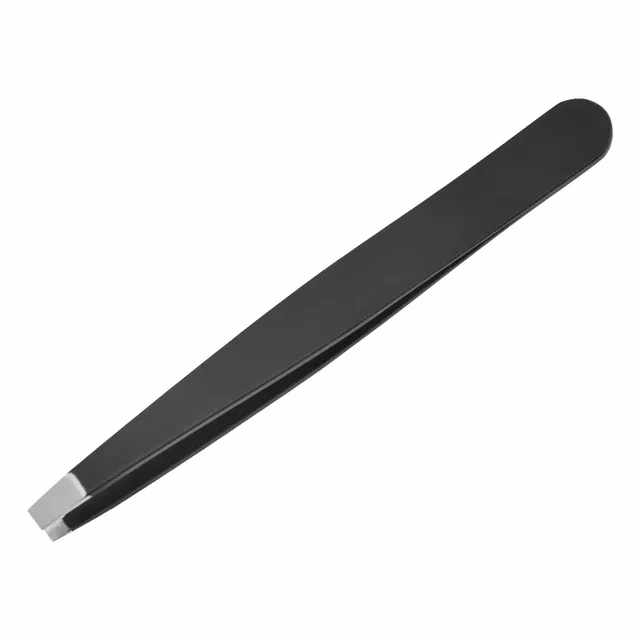
If you need to remove the BS from the enclosure, such as for antenna replacement, always adhere to the following instructions. There are two methods at your disposal, and for both, you'll require a hair dryer/Heatgun and Tweezers. We strongly advise against using tweezers with a different shape than those with flat and blunt ends, as shown in the image below. The use of differently shaped tweezers may result in damage to the BS itself, voiding the warranty.
Recommended Tweezer
 |
Method 1: Extrusion
Apply hot air to the enclosure, ensuring the temperature remains below 60 degrees Celsius, for a few seconds. As the package softens, use tweezers to gently push the BS through the hole located beneath the left antenna. A small cutout beneath the left antenna hole, visible when viewing the enclosure with the Dronetag logo on top, can guide you.
Method 2: Extraction
Delicately heat the package with a hair dryer or heat gun, keeping the temperature below 60 degrees Celsius. As the package softens, use tweezers to extract the BS. Use tweezers to grip the BS between the connectors; avoid holding the BS directly by the connectors to prevent damage.