Using the Dronetag ATAK Plugin
The Dronetag ATAK Plugin connects a Dronetag RIDER to ATAK (Android Team Awareness Kit) over a USB-C cable or Bluetooth LE — no cellular data or cloud connectivity required. Every drone (and pilot) detection decoded by RIDER appears as a live track on the ATAK map and is shared with the rest of your TAK network via CoT (Cursor on Target).
Because it works entirely over USB or Bluetooth, the plugin keeps working in terrain with poor or no cellular coverage — exactly where RIDER and ATAK are most often used together.
This guide assumes you already have ATAK-CIV installed and running, configured with (or without) a connection to your TAK server. The plugin works the same way whether or not ATAK is currently connected to a server — a server connection only affects whether your detections are relayed to other TAK users.
Prerequisites
Before you begin, make sure you have:
- ATAK-CIV installed, version 5.6.0 or later (check under Settings → About ATAK)
- Android 11 or later
- A Dronetag RIDER, with a USB-C cable or paired over Bluetooth LE
The plugin is built to run on ATAK 5.6.0 and stays compatible with newer ATAK releases (5.7, 5.8, …) as they come out — you don't need to match an exact version, just that minimum.
Installing the plugin
The plugin is distributed through the Play Store, under the Dronetag developer account:

Install it like any other Android app. Because it's an ATAK plugin, not a standalone app, it won't appear with its own icon on your home screen — opening it always happens from inside ATAK.
Checking that the plugin loaded
The first time a new plugin is installed, ATAK requires you to approve it before it loads. Open Settings → Tool Preferences → Package Management:
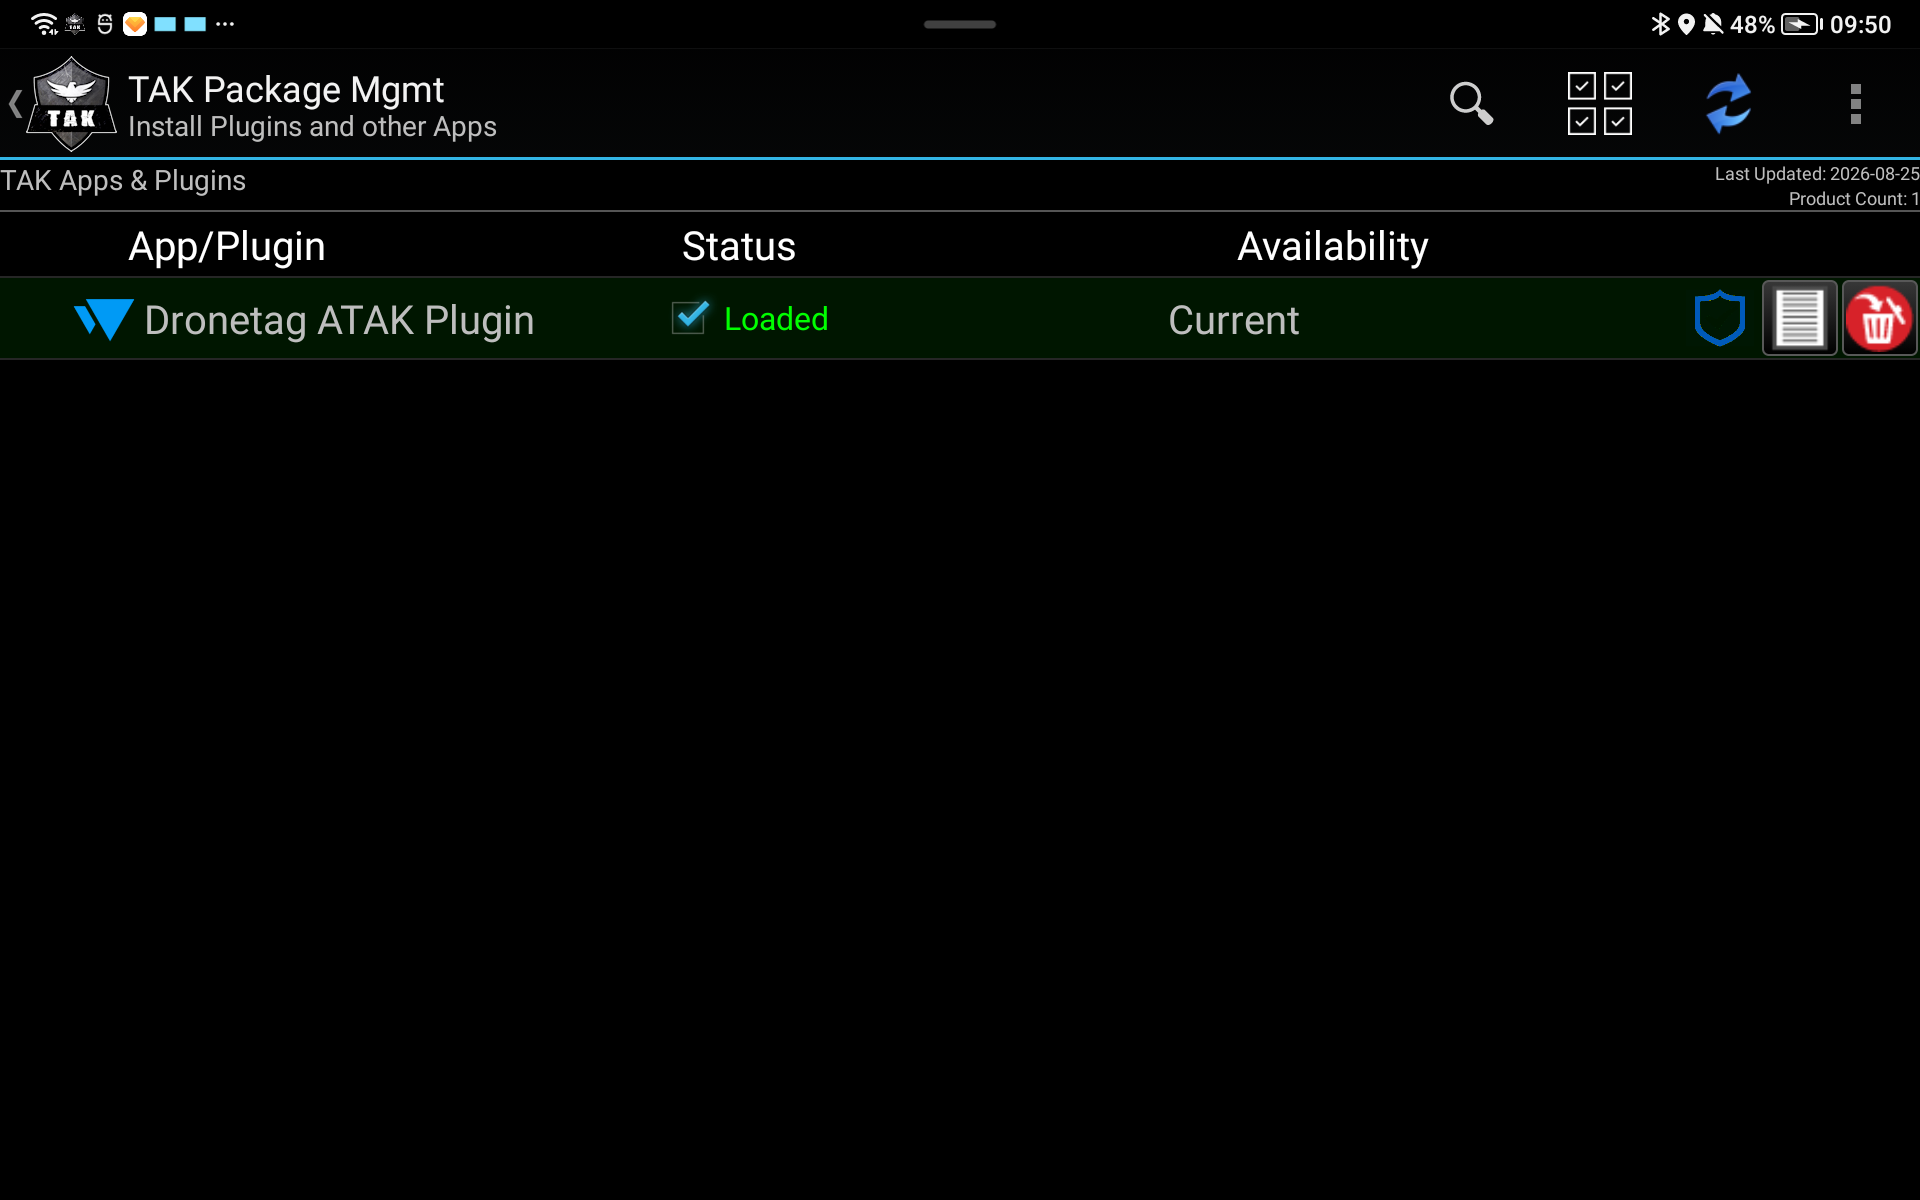
Look for Dronetag ATAK Plugin in the list:
- Loaded (green, checked) — the plugin is active and ready to use.
- Unloaded / unchecked — tap the checkbox next to it to load it.
If you install a new build of the plugin while ATAK is running, it can get stuck in an "unloaded" state until you check the box here again — this is normal ATAK behavior for any plugin update, not specific to Dronetag.
Main UI
Once loaded, the plugin adds a Dronetag tile to ATAK's tools menu (the hamburger icon in the top toolbar → Tools). It sits near the end of the tools grid, after the built-in tools:
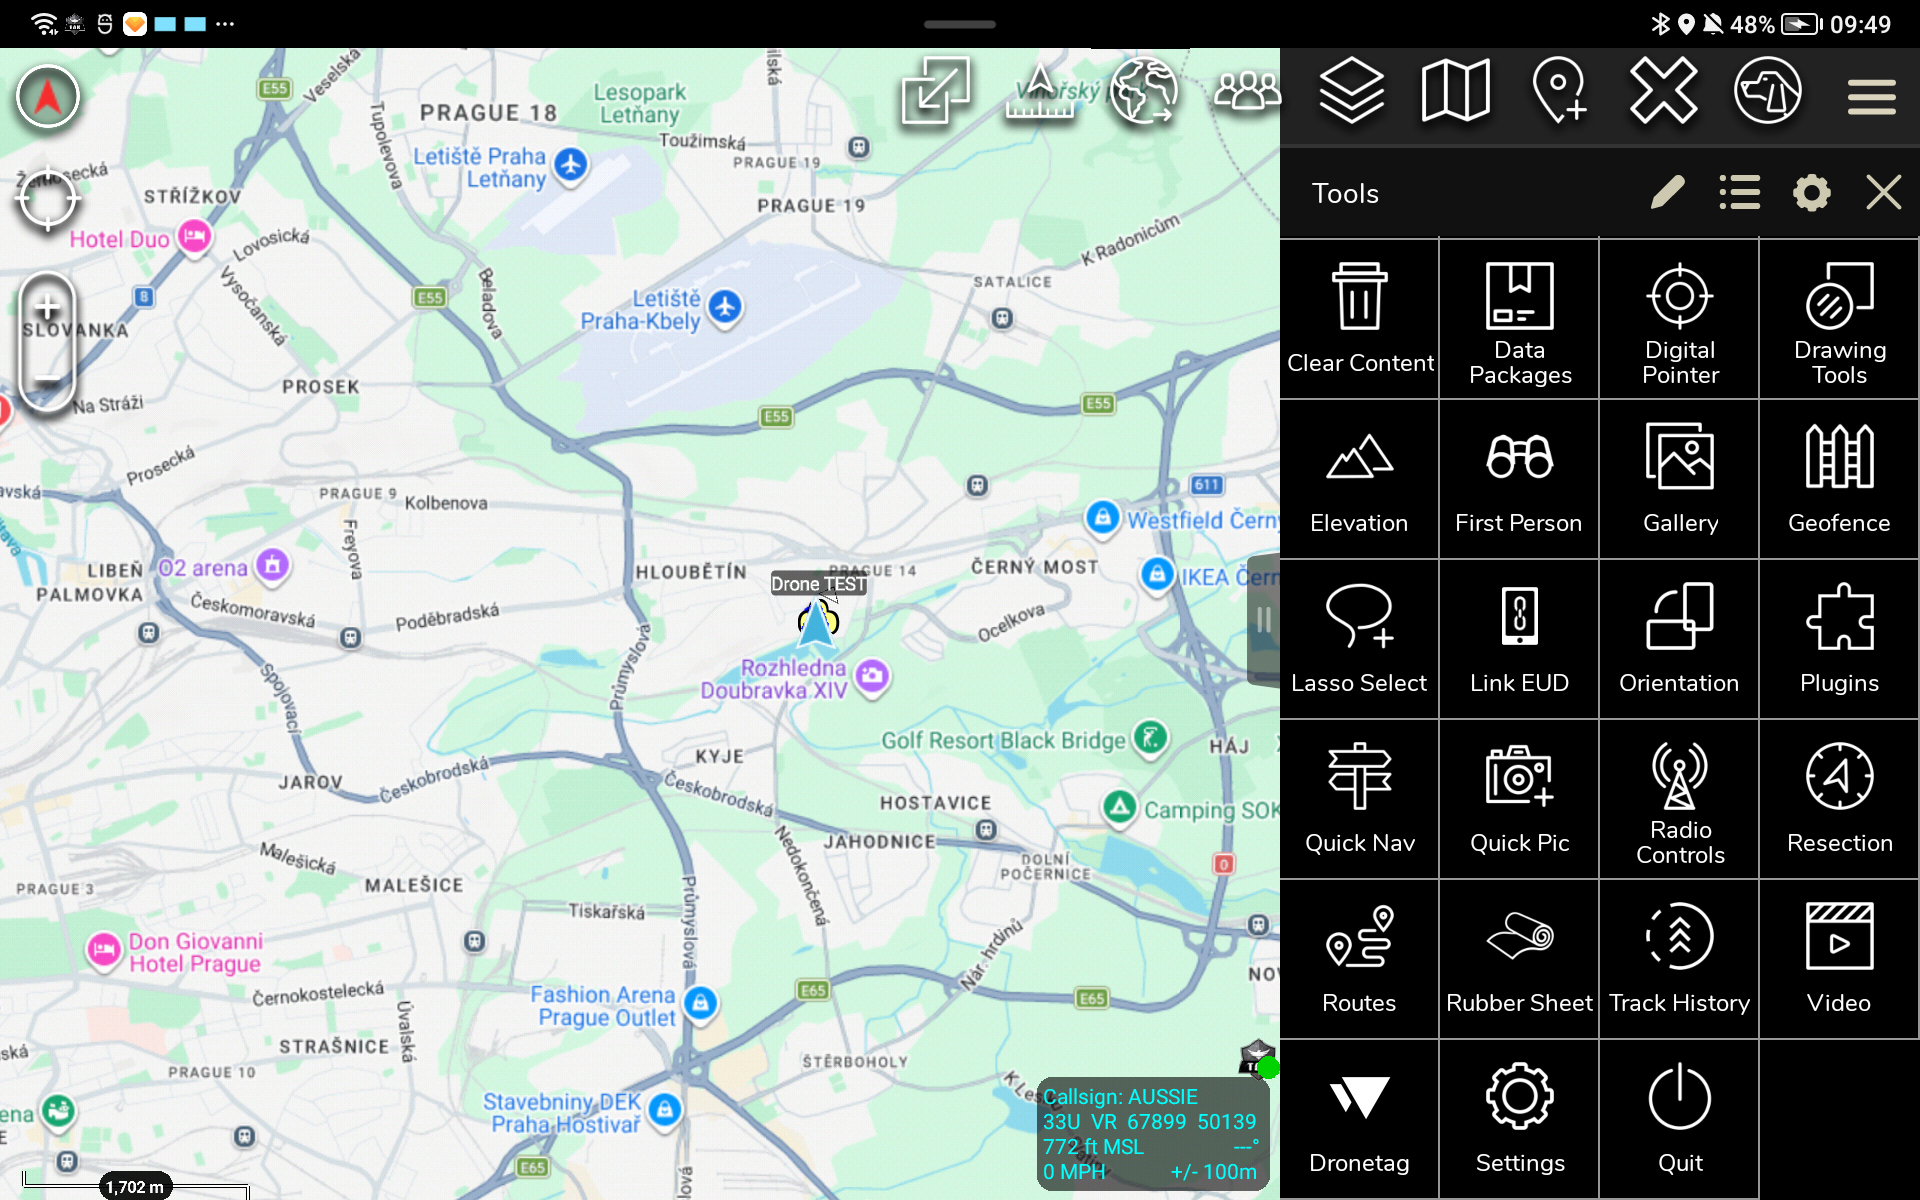
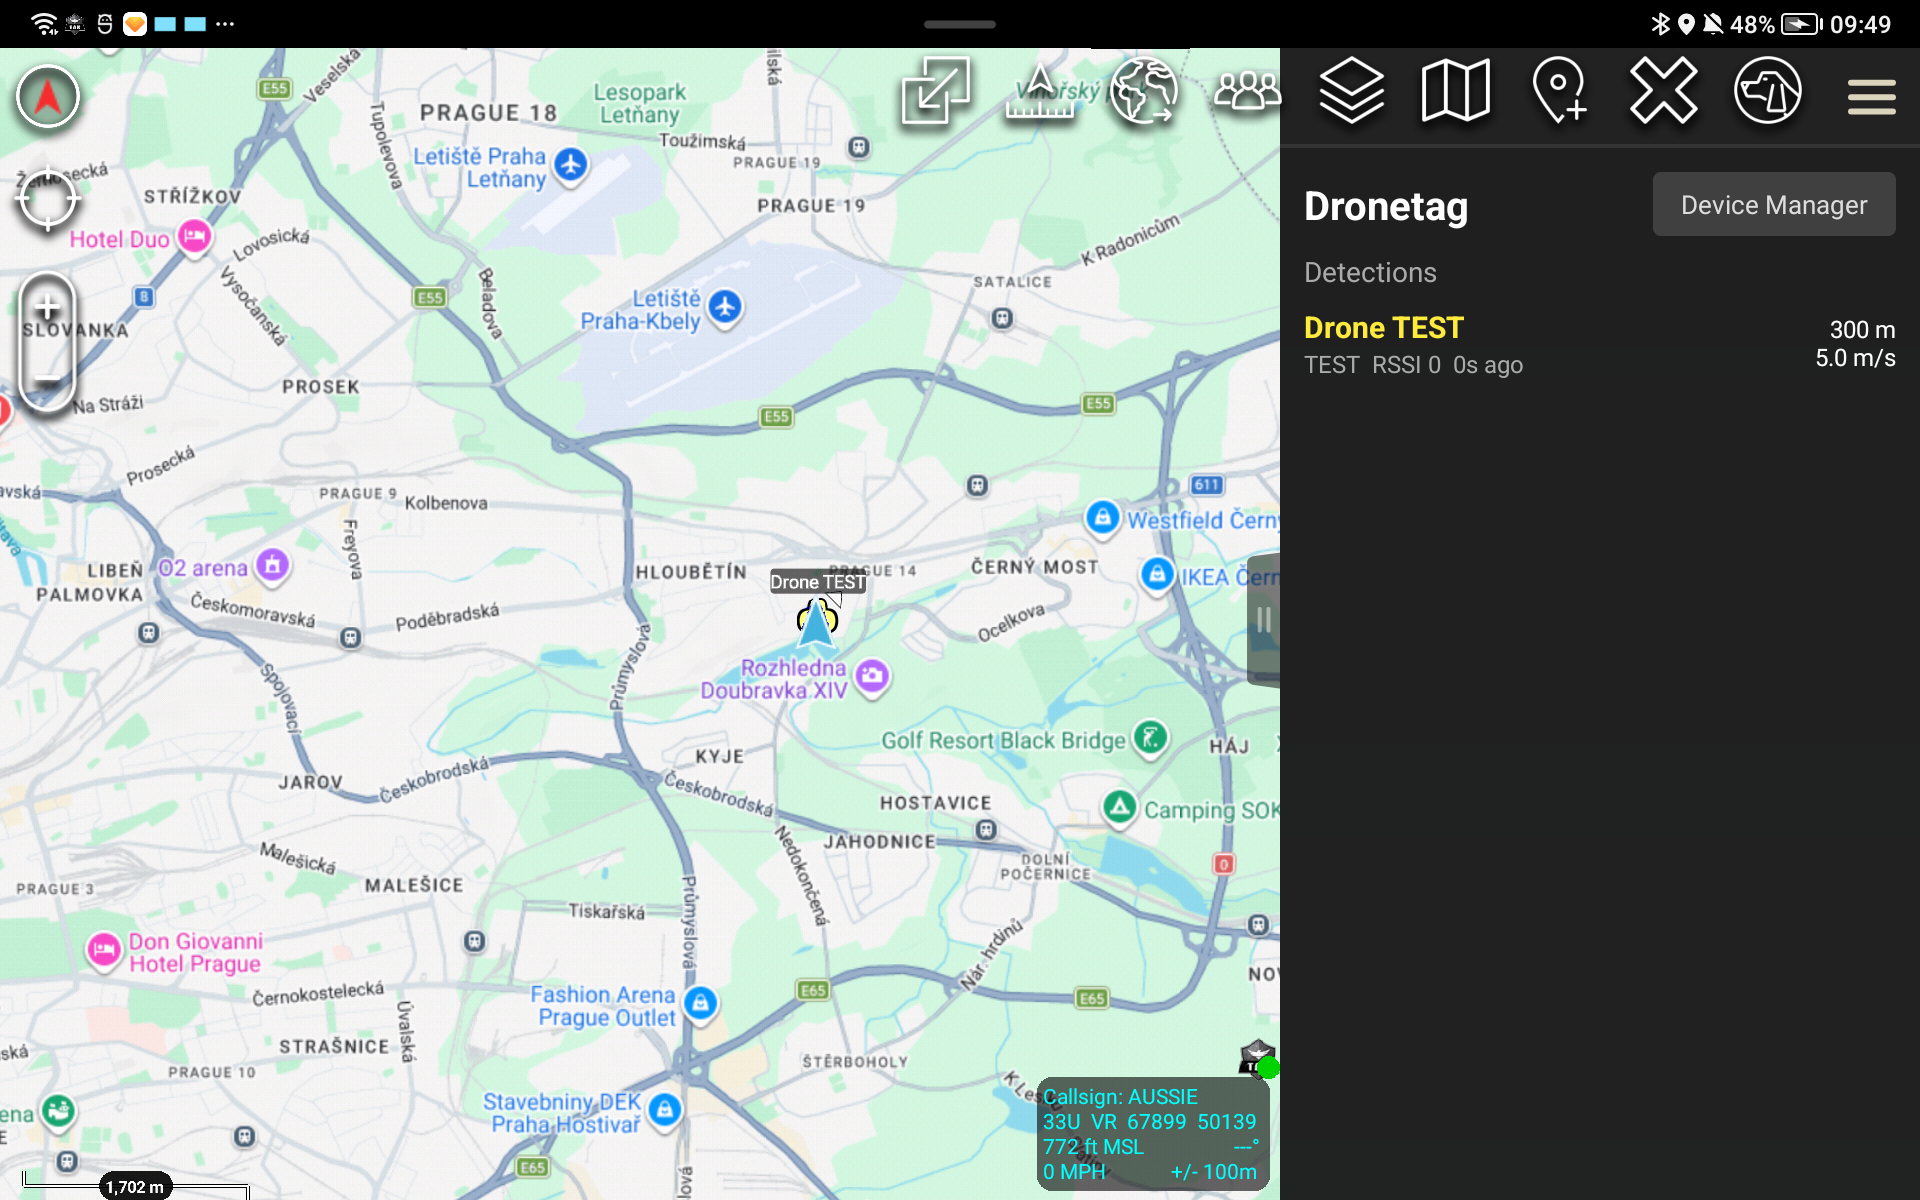
Tapping it opens the Dronetag side panel, which is your main interface — a running list of all current detections, and a Device Manager button in the top-right corner to manage your RIDER connection:
Connecting your RIDER
Open Device Manager (top-right of the Dronetag panel) to manage connections:
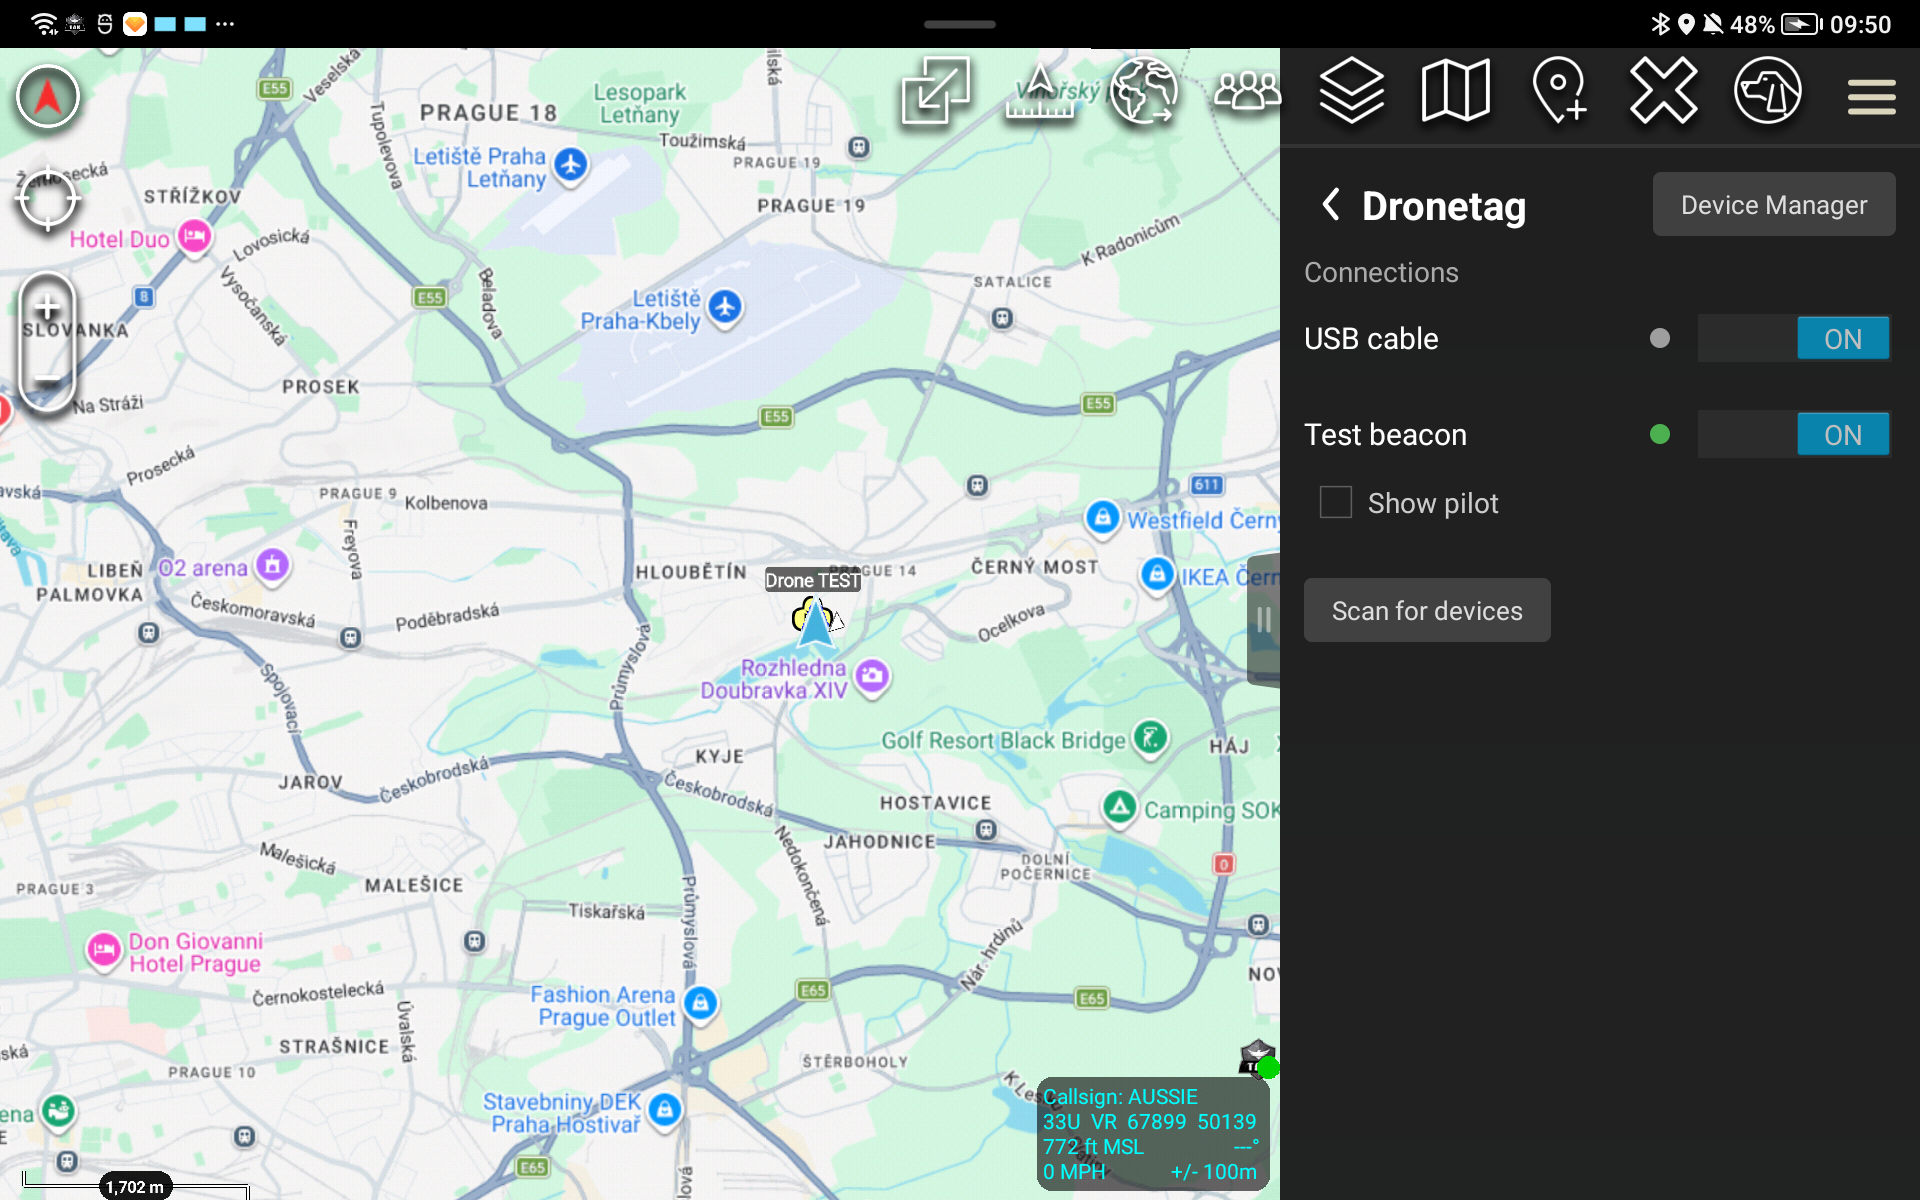
- USB cable — turn this on and plug your RIDER in with a USB-C cable. ATAK will prompt for USB permission the first time.
- Test beacon — see Using the test device below.
- Scan for devices — searches for nearby RIDERs over Bluetooth LE and lists any found so you can connect:
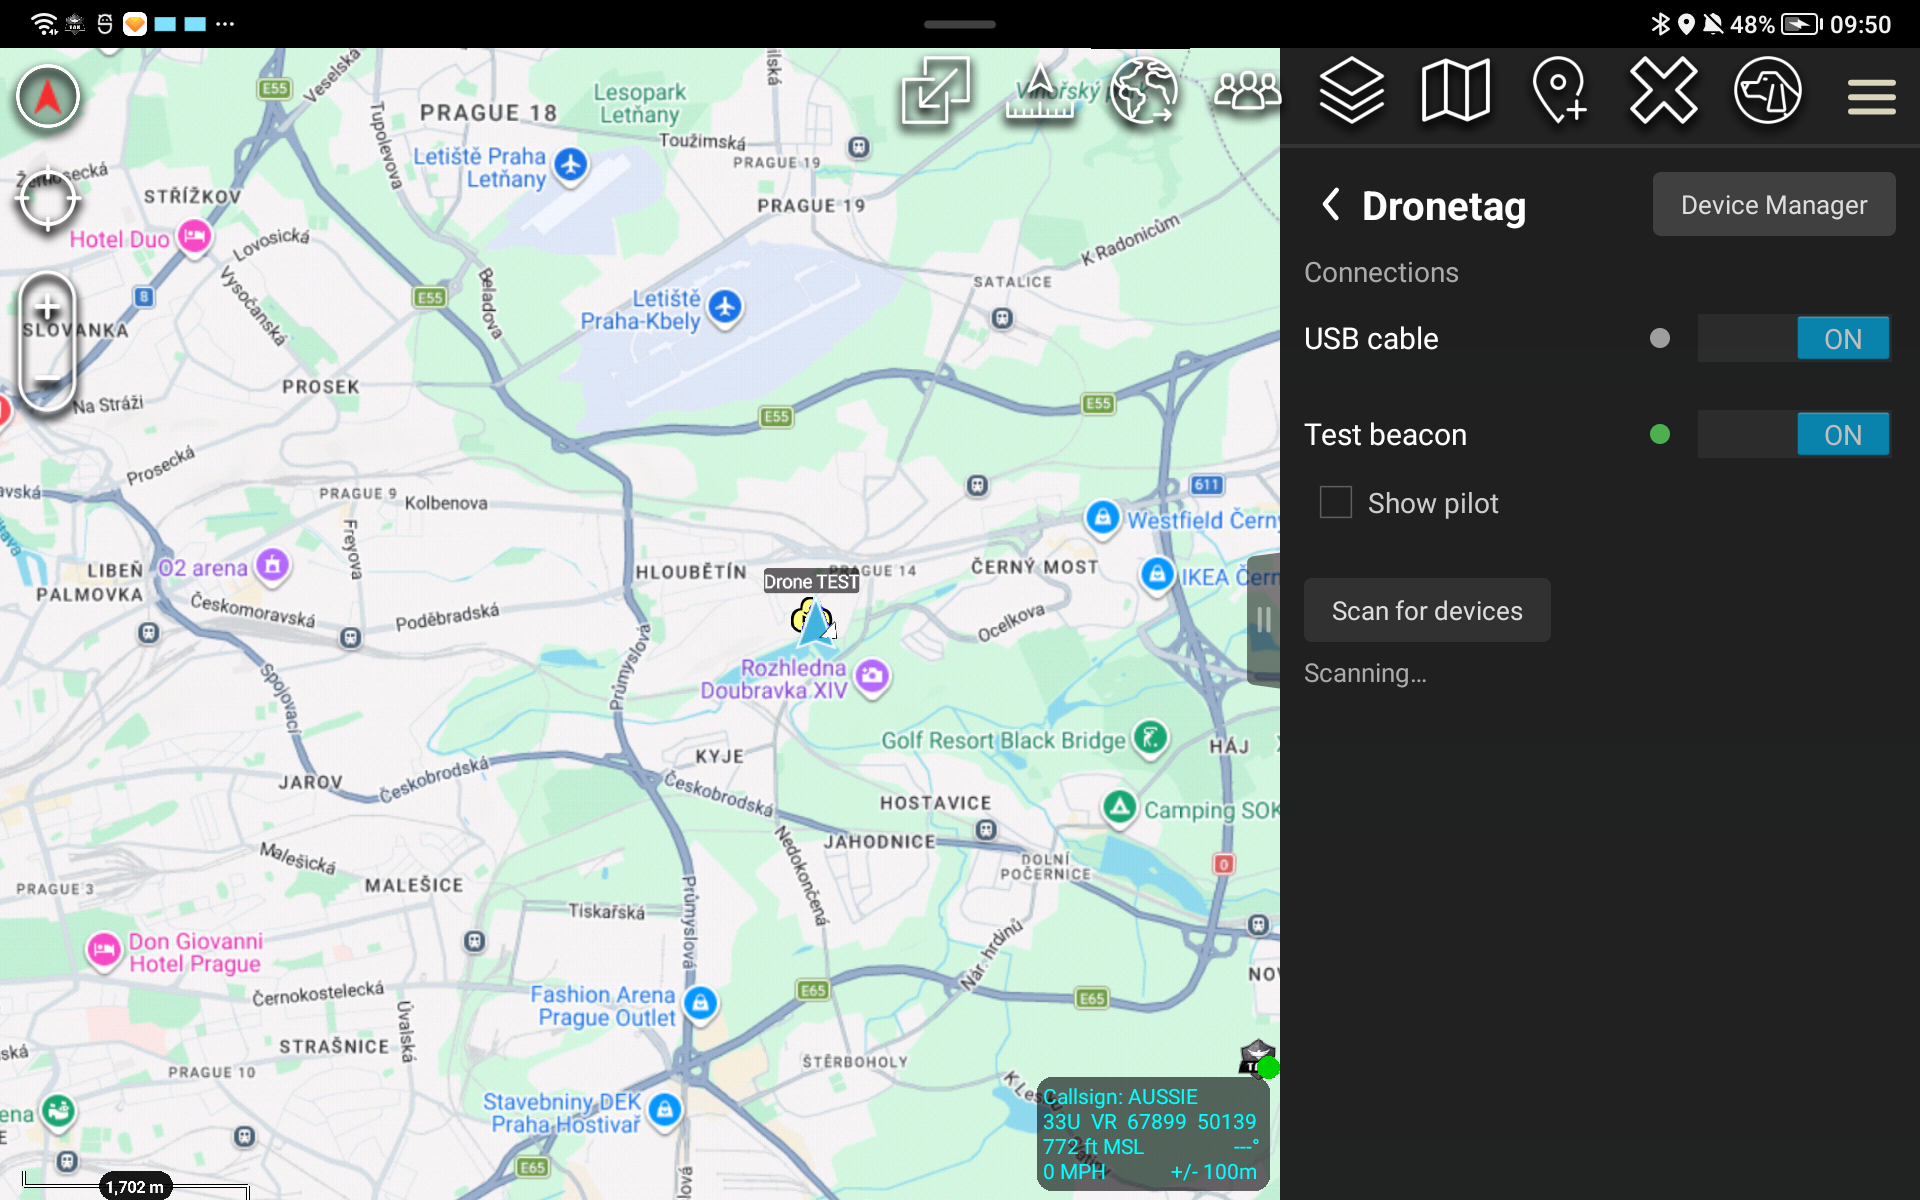
Only one app can hold the Bluetooth connection at a time. A RIDER accepts a single Bluetooth central connection at once. If the Dronetag App, Dronetag Toolbox, or Drone Scanner is already connected to your RIDER over Bluetooth, the ATAK plugin will fail to connect — often with no clear error, since Bluetooth doesn't tell a rejected device why it was refused.
If your RIDER won't connect in ATAK, check whether another Dronetag app on the same phone (or a different phone) already holds the Bluetooth link, and disconnect it there first. If you're not sure, power-cycle the RIDER to force it to drop any stale connection.
Information displayed
Tap any entry in the detections list to open its detail page:
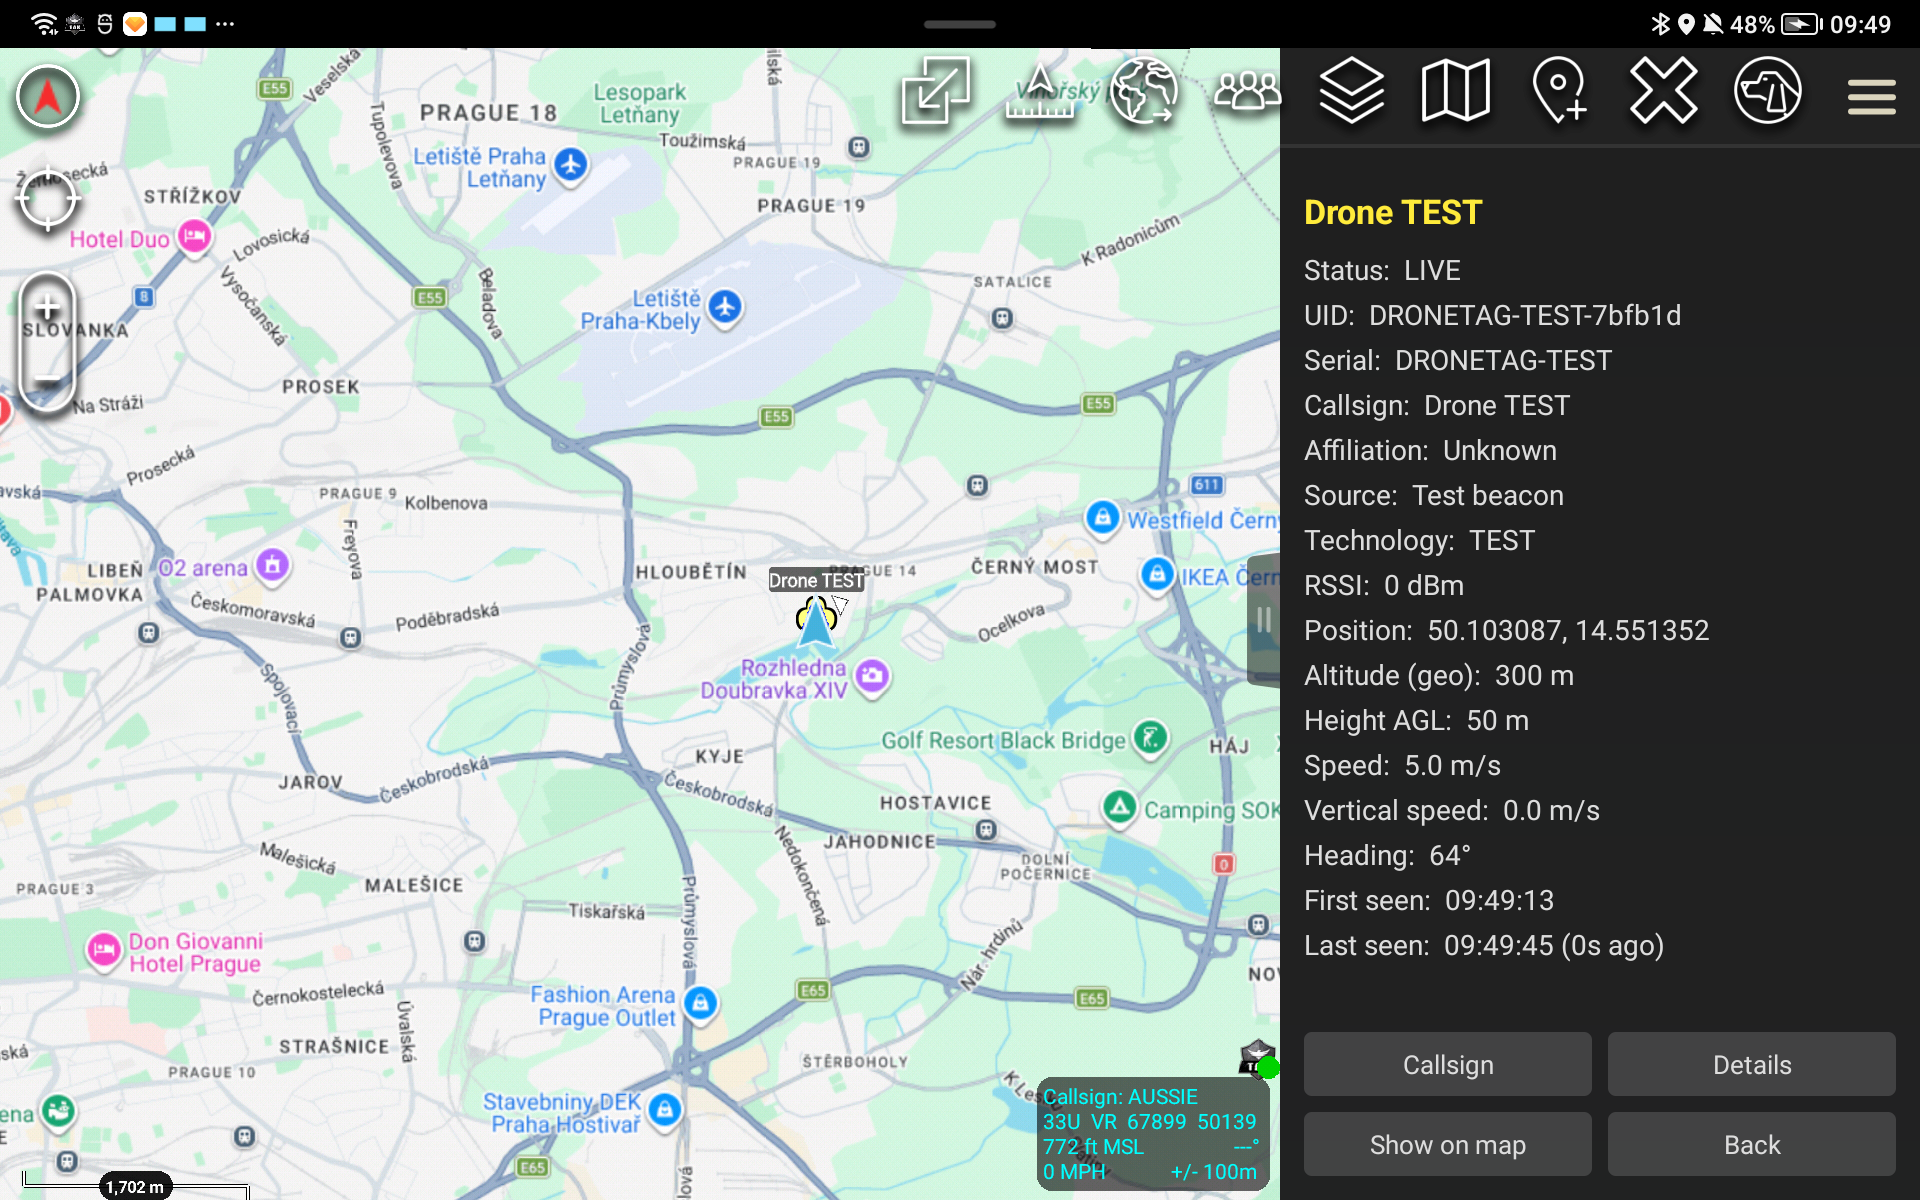
This shows everything decoded from the drone's Remote ID broadcast: status, UID, serial number, callsign, affiliation, the technology used (Bluetooth or Wi-Fi), signal strength, position, altitude, height above ground, speed, vertical speed, heading, and when it was first/last seen. If the broadcast includes a pilot location, a separate pilot marker appears on the map linked to the same drone.
From this page you can also:
-
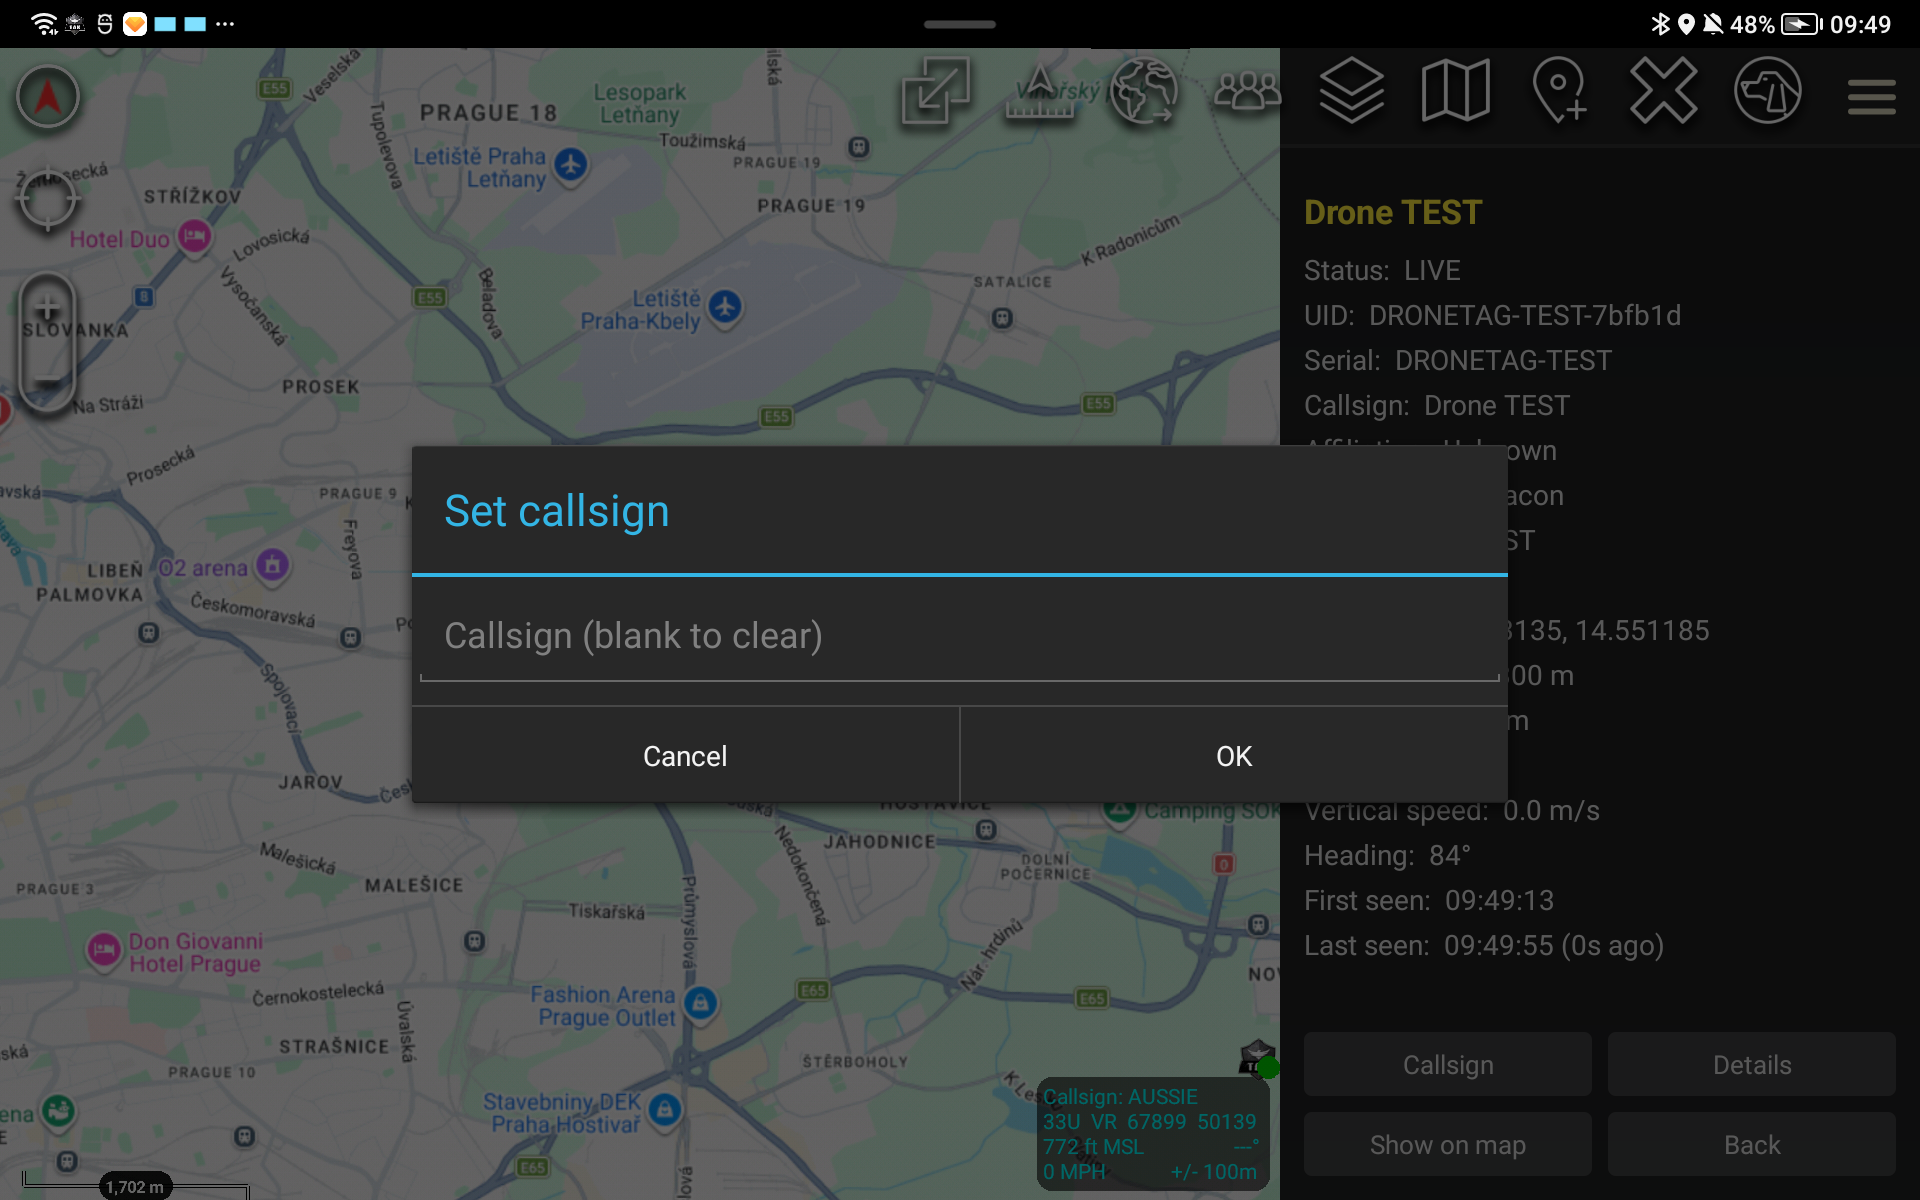
Callsign — set a custom callsign for this detection, overriding the default name:
-
Details — look up the maker, model, and specifications of the aircraft, when identifiable from its serial number
-
Show on map — center the map on this detection
-
Back — return to the detections list
Using the test device
The Test beacon, toggled on from Device Manager, simulates a synthetic drone orbiting your own location — no real RIDER or real drone required. It's useful for:
- Verifying connectivity: confirming the full pipeline (plugin → ATAK → CoT → your TAK server) works before you need it in the field
- Demonstrating the plugin: showing a team how detections look and behave without waiting for real air traffic
It behaves exactly like a real detection — it appears in the list, has a position and heading, and can be renamed or inspected the same way — so it's a safe way to learn the UI before your first real deployment.
Settings
The plugin's own settings live under Settings → Tool Preferences → Specific Tool Preferences → Dronetag ATAK Plugin:
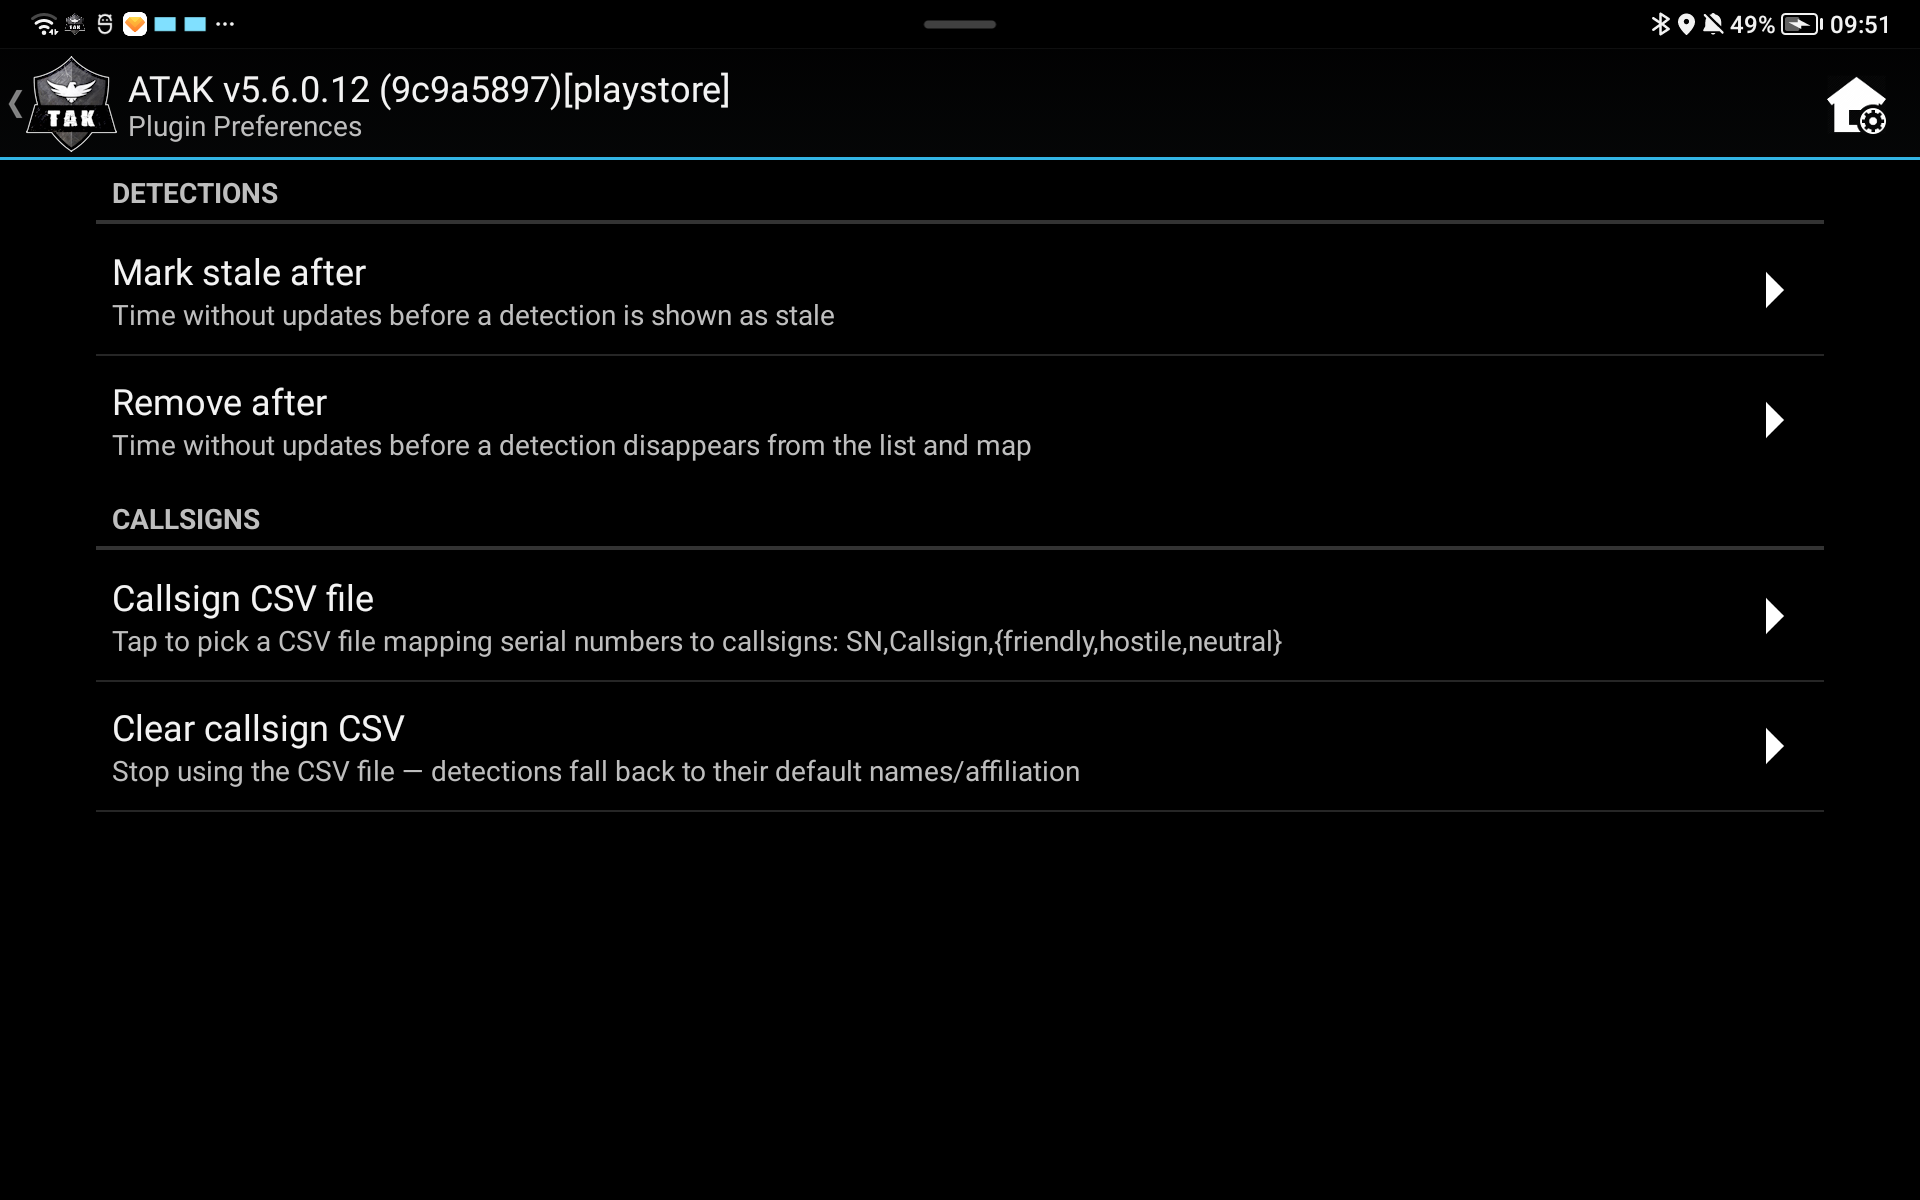
Detections
- Mark stale after — how long a detection can go without an update before it's shown as stale on the map
- Remove after — how long before a stale detection is removed from the list and map entirely
Callsigns — see below.
Working with the Callsign list
Instead of naming detections one at a time, you can bulk-assign callsigns and affiliations from a CSV file:
- Prepare a CSV with one row per known drone:
For example:
SN,Callsign,{friendly,hostile,neutral}1596M0170424A1234,Patrol 1,friendly
1596M0170424A5678,Unknown Contact,hostile - Go to Settings → Tool Preferences → Specific Tool Preferences → Dronetag ATAK Plugin → Callsign CSV file, and pick the file using ATAK's file browser.
- The plugin matches detections to rows by serial number, applying the callsign and affiliation from the matching row.
A few things worth knowing:
- The CSV is reloaded automatically whenever the file changes — no need to reselect it after an edit.
- A manual callsign set from a detection's detail page (see Information displayed) always takes priority over the CSV for that detection.
- If a detection's serial isn't in the CSV, it falls back to a generated name (
Drone <last 4 characters of serial>). - Clear callsign CSV stops using the file entirely — all detections fall back to their default names and affiliations.