DRI Configuration
This guide explains how to configure your Dronetag DRI using a mobile application. It applies to all:
- Integration in EU
- Retrofit Integration in US
- Standard Remote ID for Manufacturers in US
Requirements
Before starting, make sure:
- You have a compatible flight controller (e.g., Holybro Pix32v5, Cube Orange, etc.)
- You’ve already flashed the correct firmware:
- Standard ArduPilot or PX4 for retrofit
- ArduPilot with OpenDroneID support for full integration; Note: PX4 currently does not support OpenDroneID
- How to create and flash firmware with OpenDroneID support is described on the page Unique firmware for Flight Controller
- You’re using a supported mobile app:
Step-by-Step Guide
Power up your Drone
Connect the battery to your drone to power up the flight controller and the Dronetag DRI for configuration.
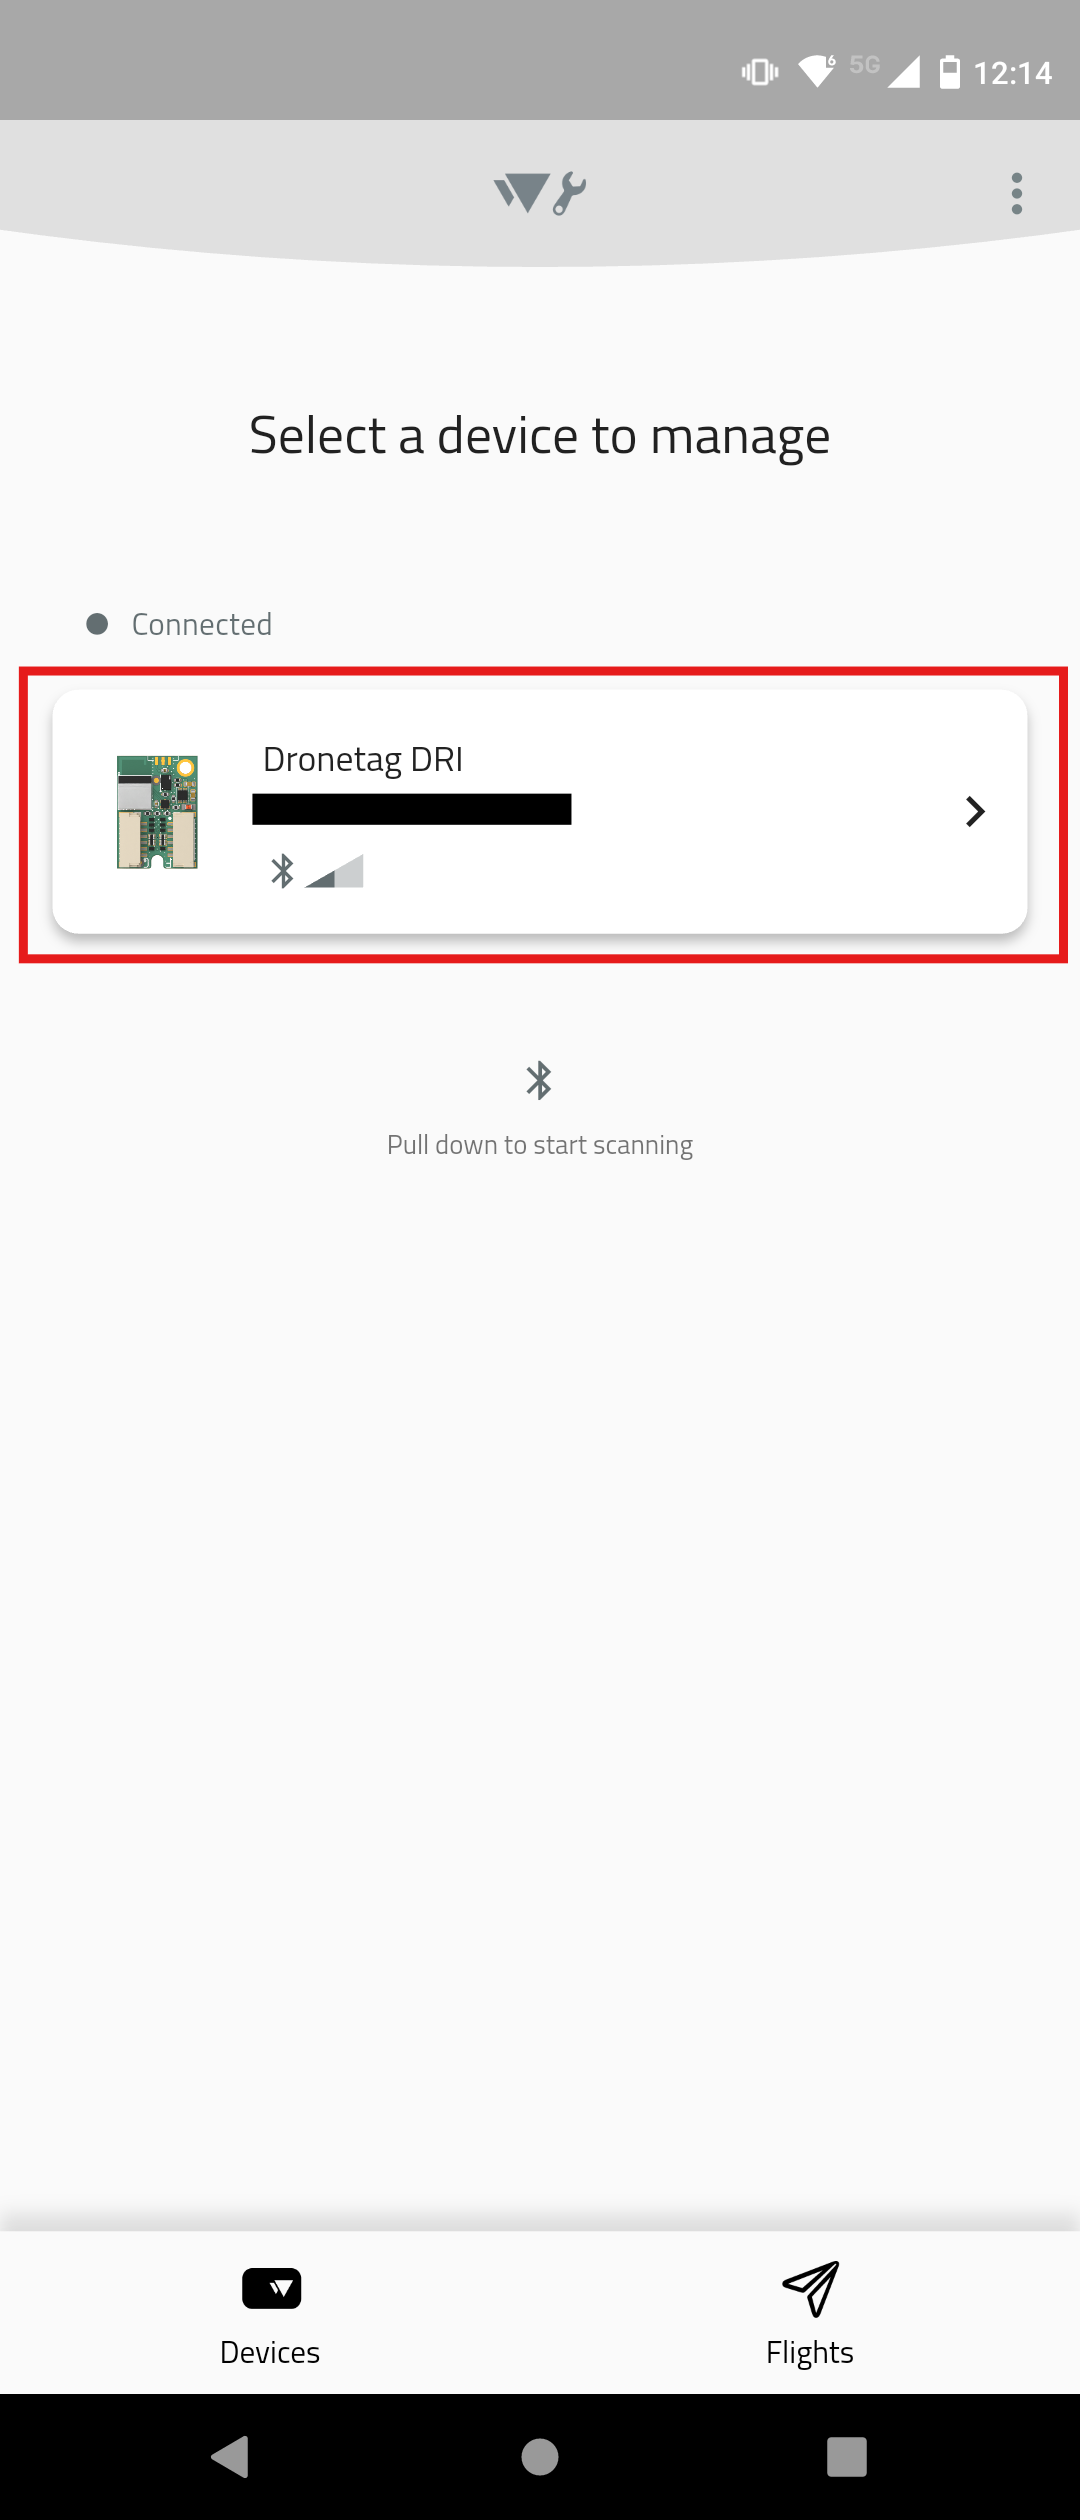
Select your Dronetag DRI
Open your Dronetag Toolbox application. On the title page, you should see active DRI devices in your proximity.
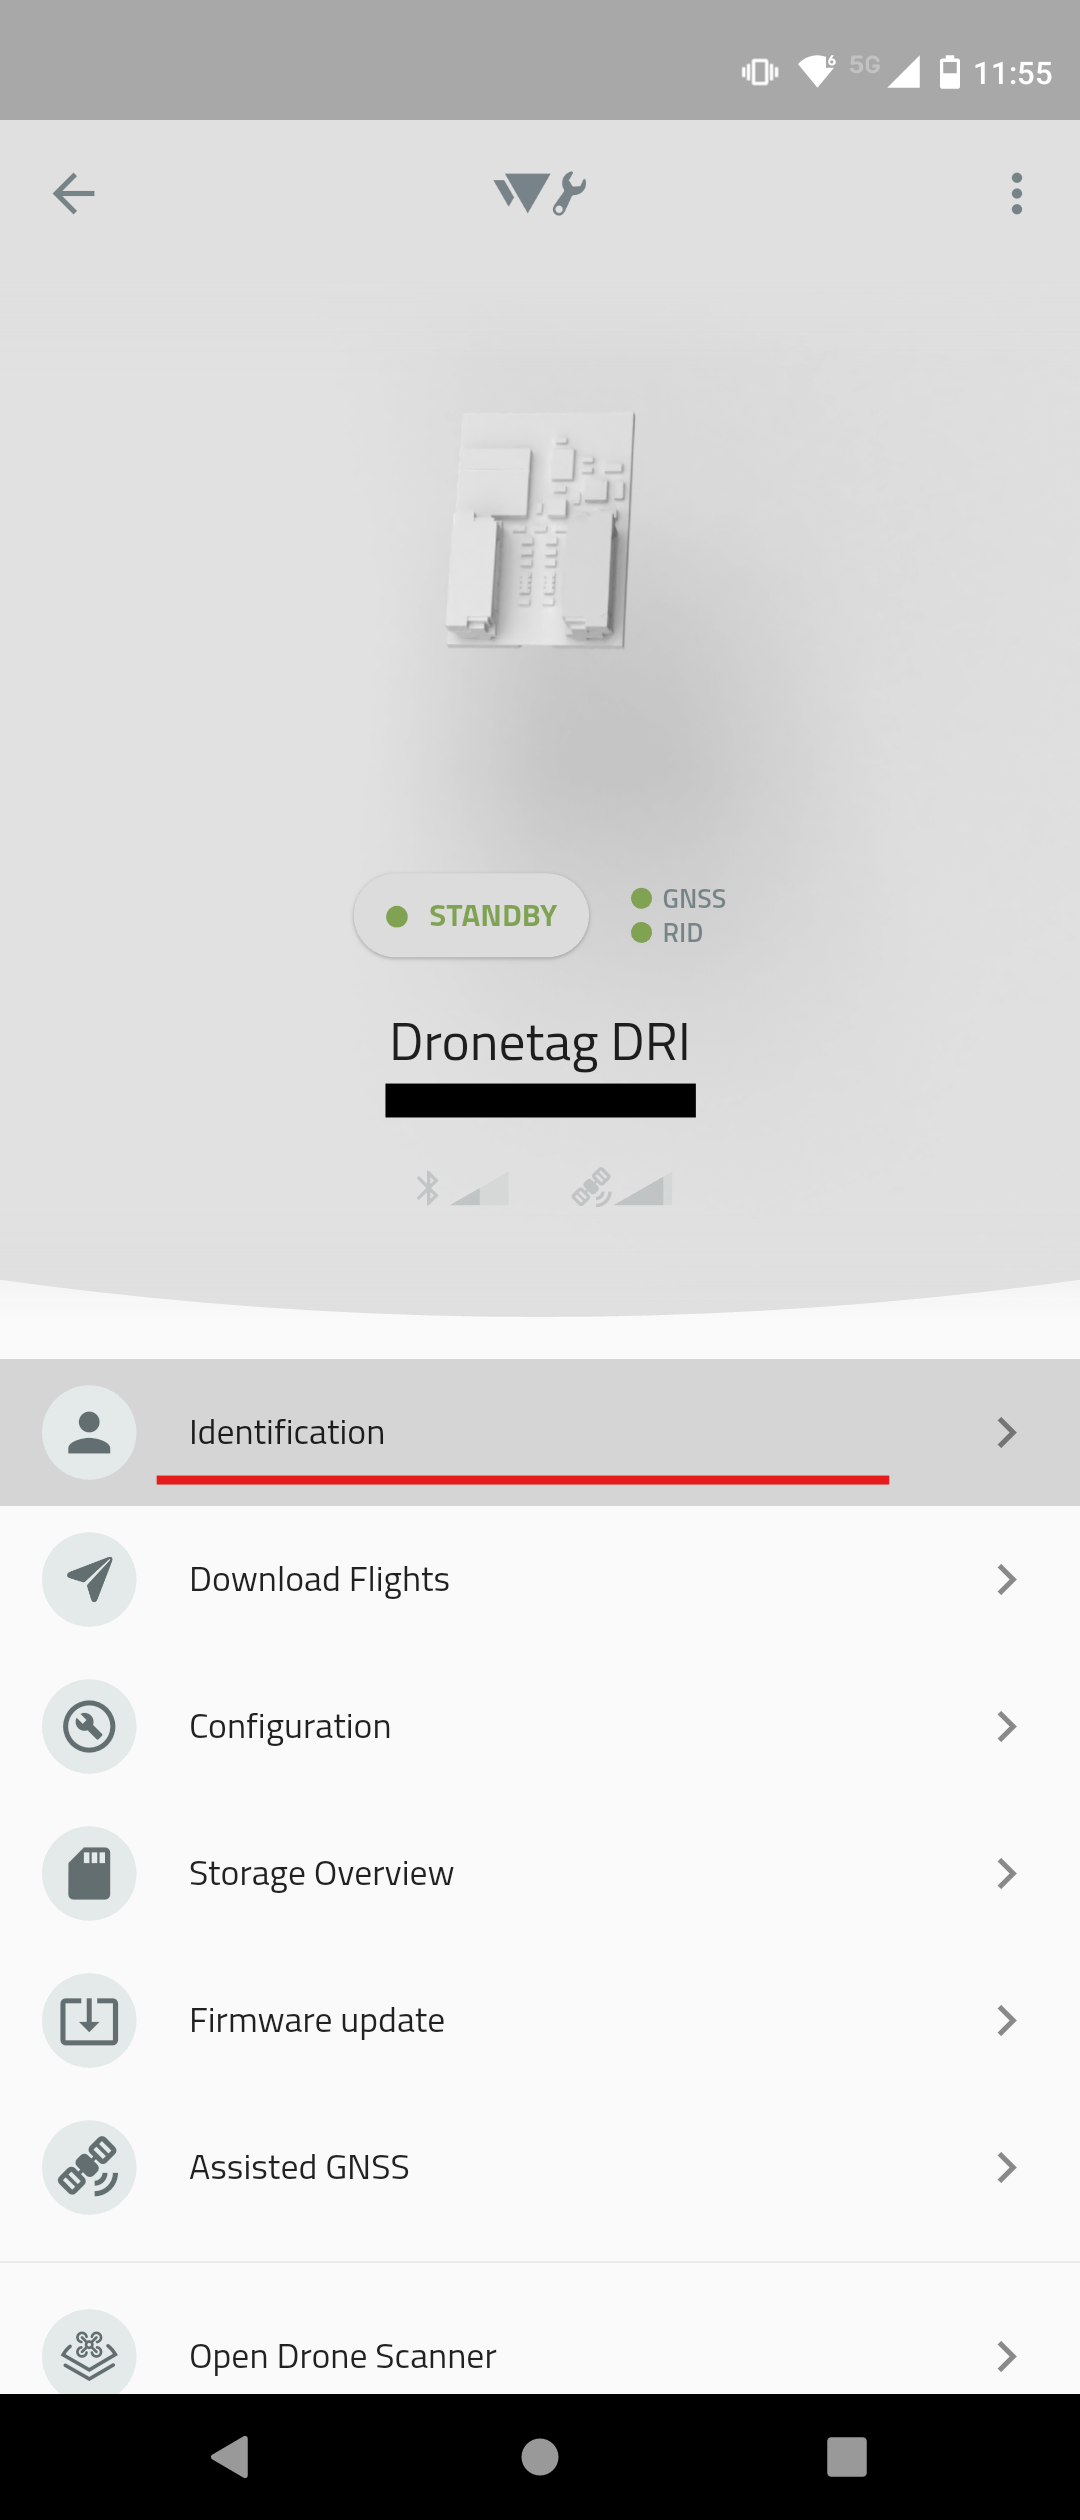
Go to Identification
In the menu, select the "Identification" option.
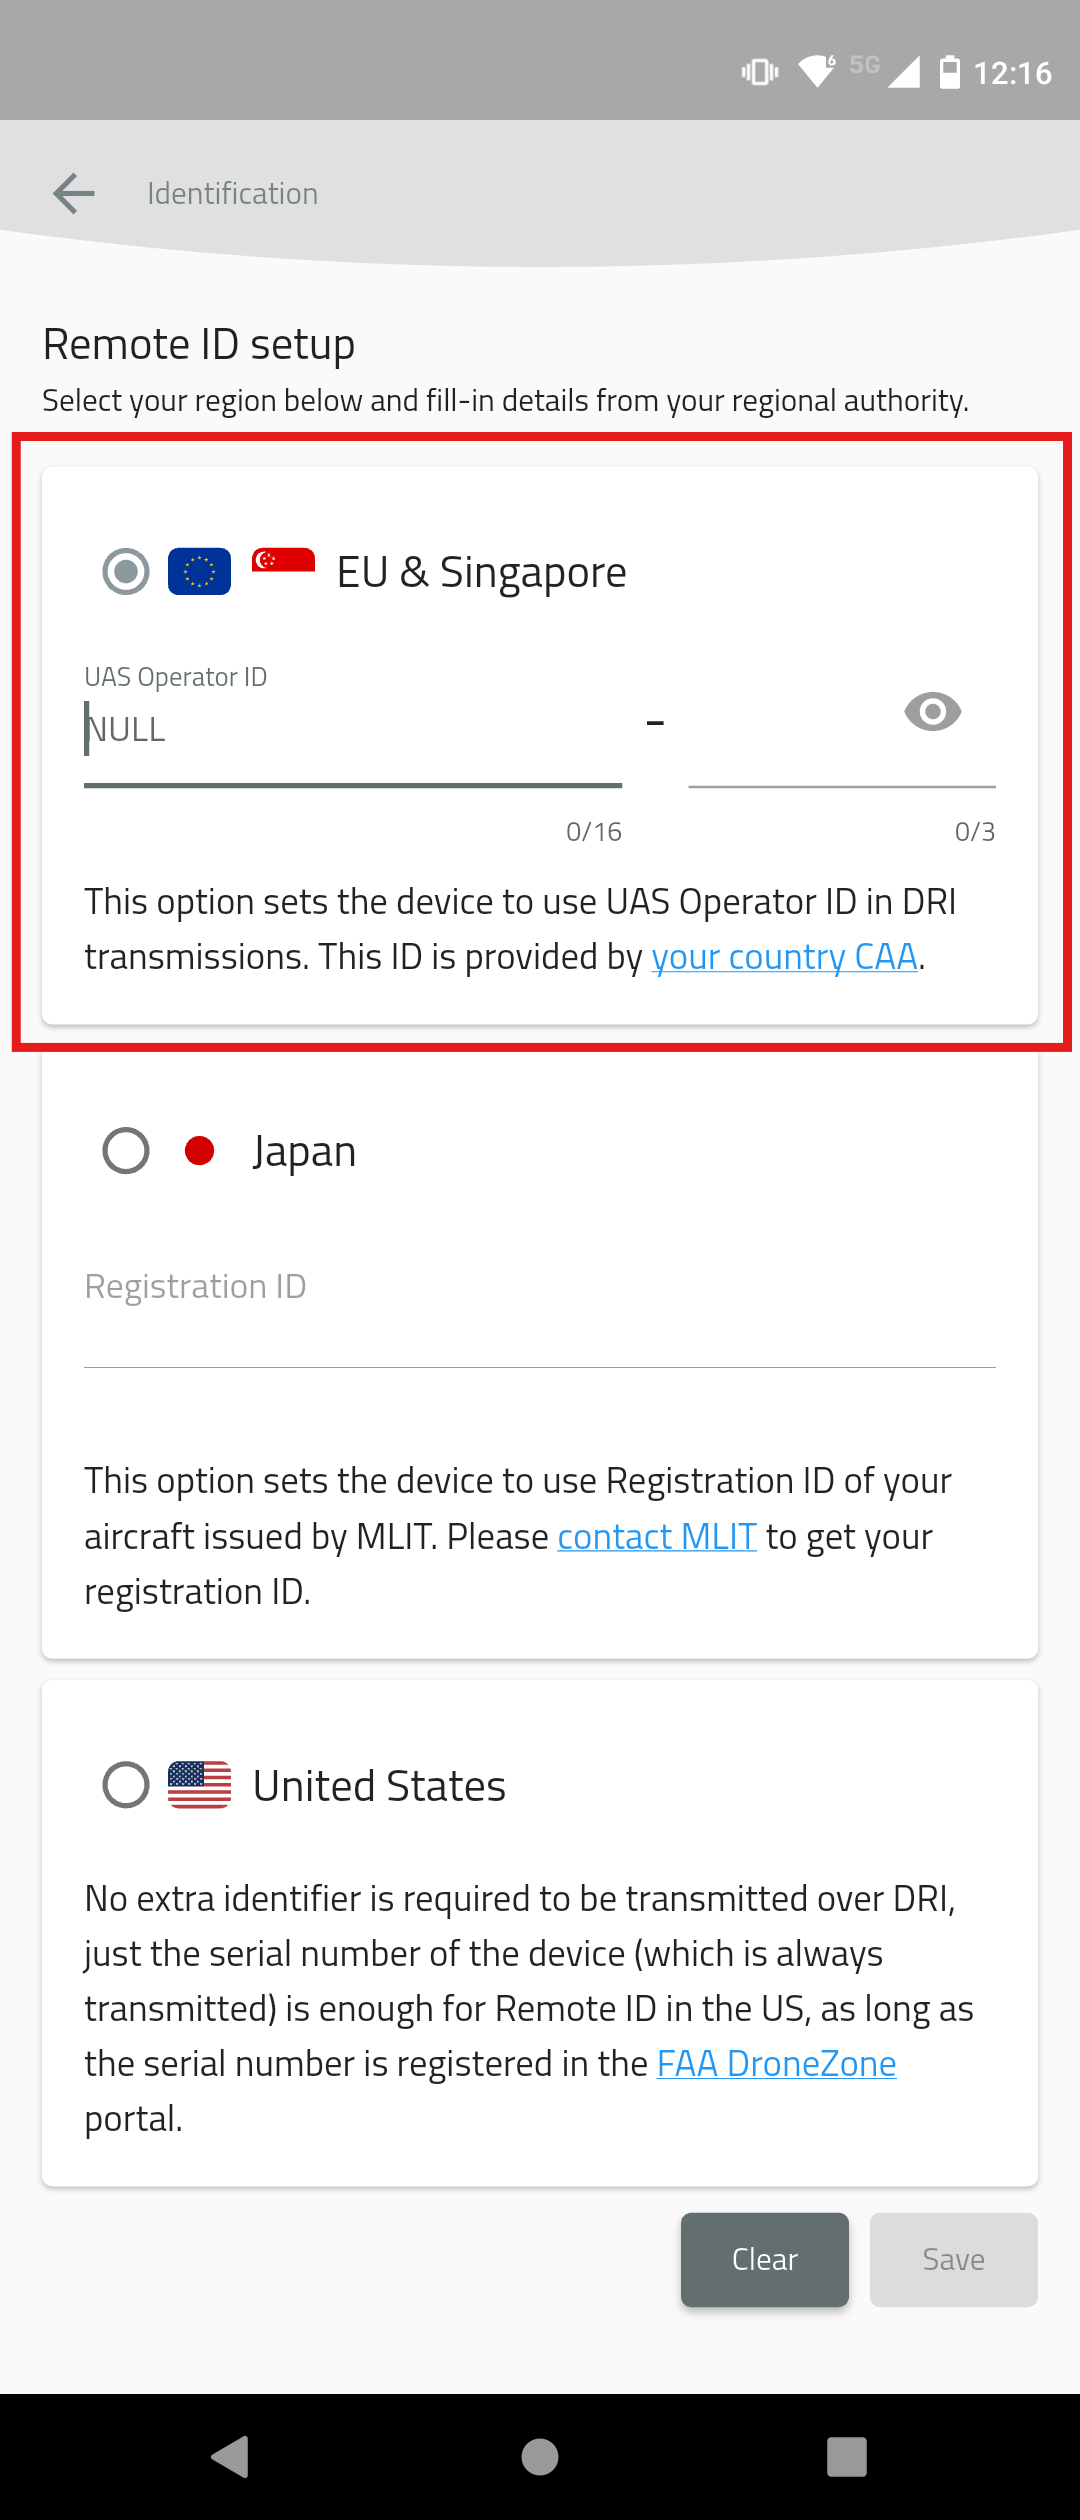
Set up Identification
The DRI device, and thus your drone identification, is configured on this screen.
- Integration in EU
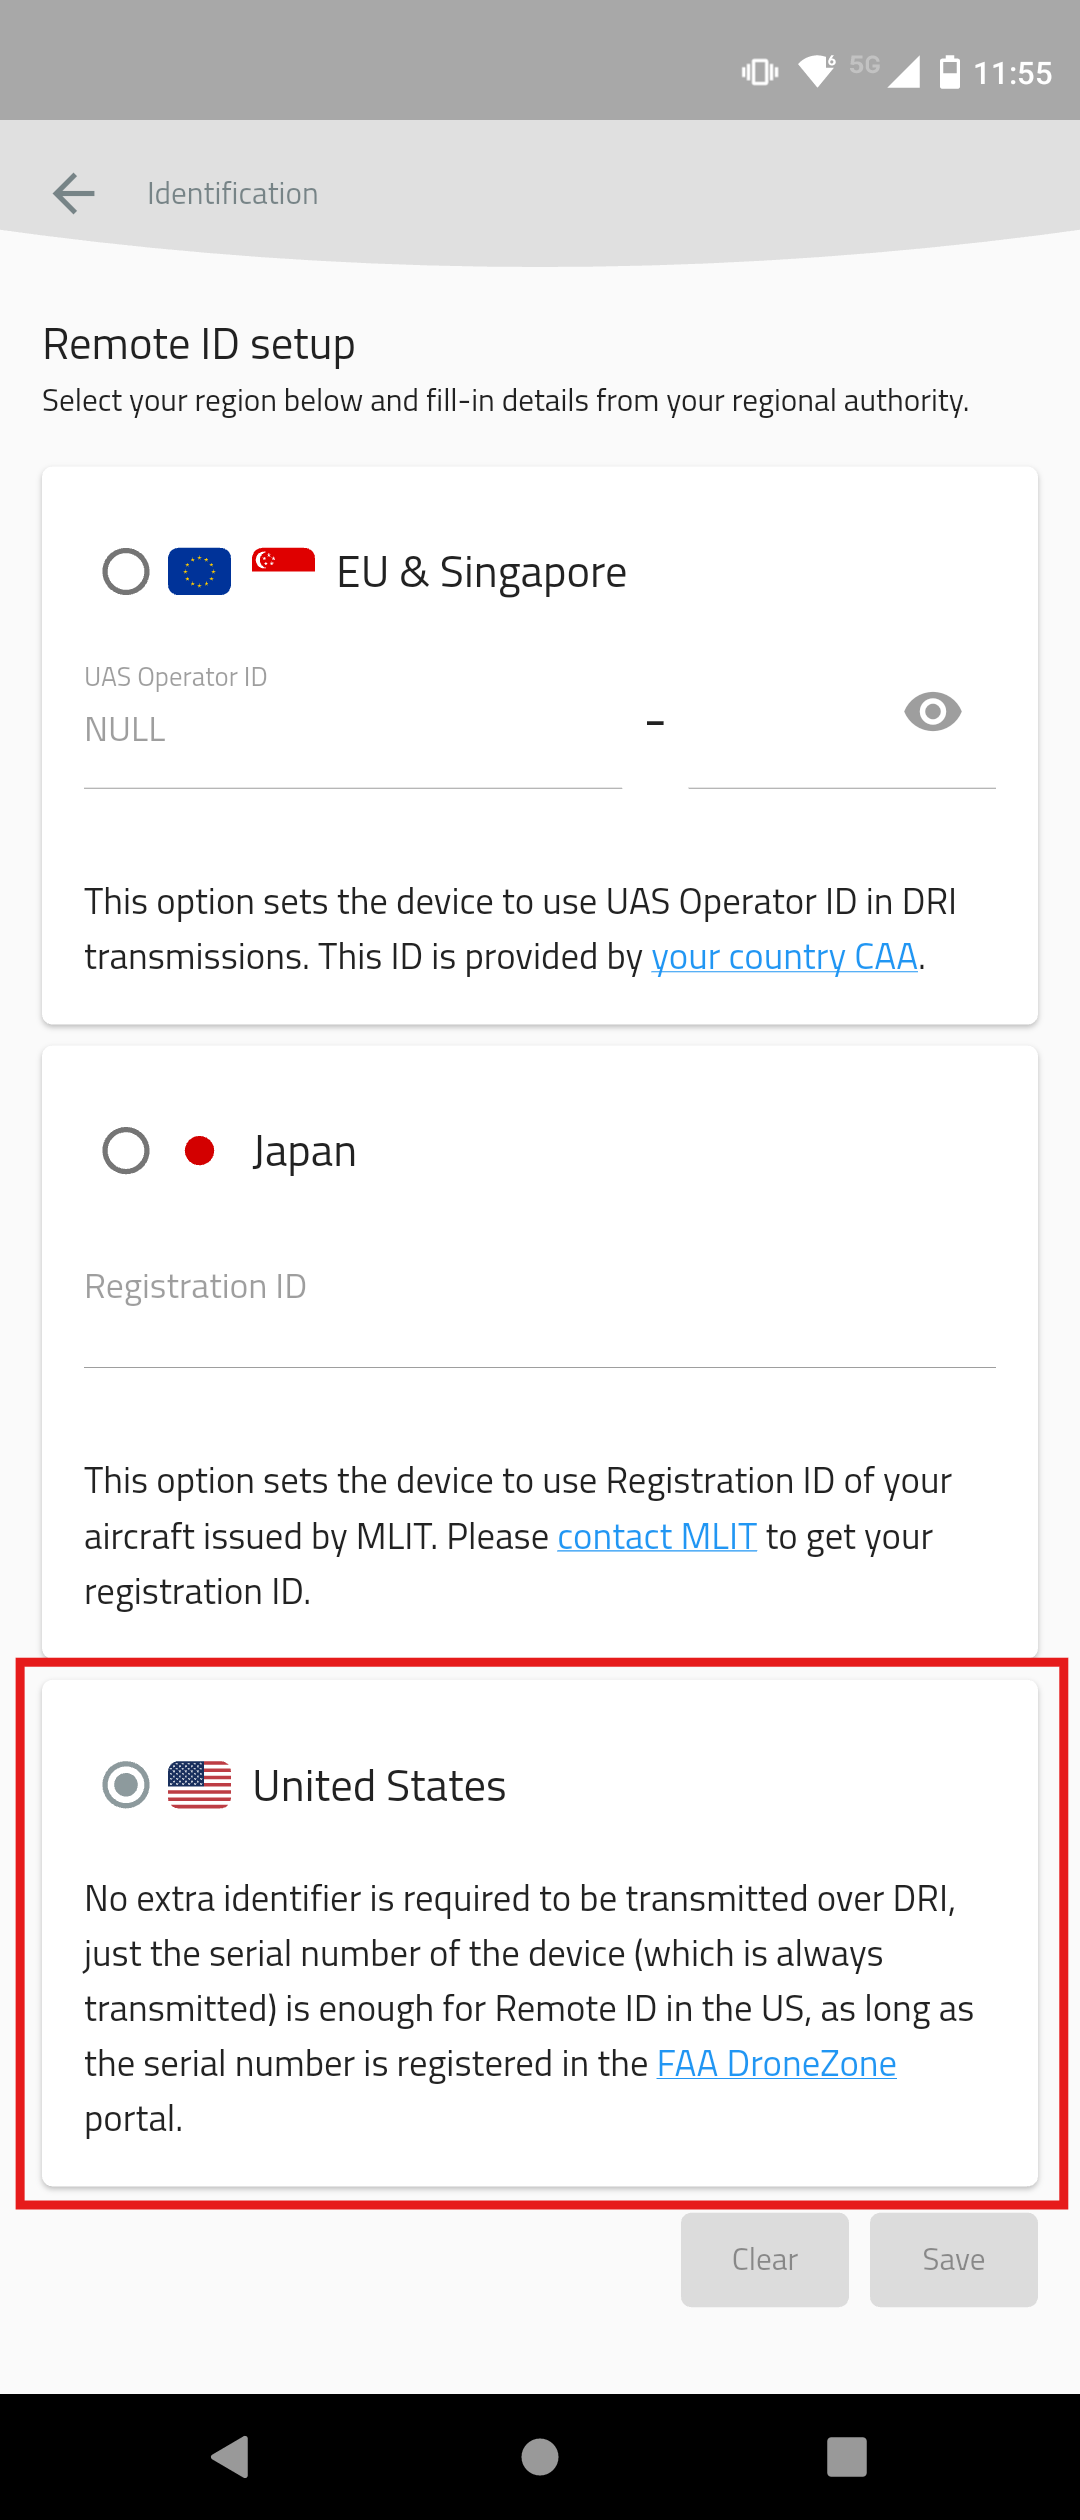
- Integration in US
Select the EU as the Remote ID setup.
Fill in the UAS Operator ID issued by your country's CAA.
Then select to save the identification.Select the United States as the Remote ID setup.
This will set the DRI device to use its serial number as the identification.
Then select to save the identification.Go to Configuration
As the next step, go to the Configuration screen.
Set up the DRI
- Integration in EU/Retrofit Integration in USA
- Standard Remote ID for Manufacturers in USA
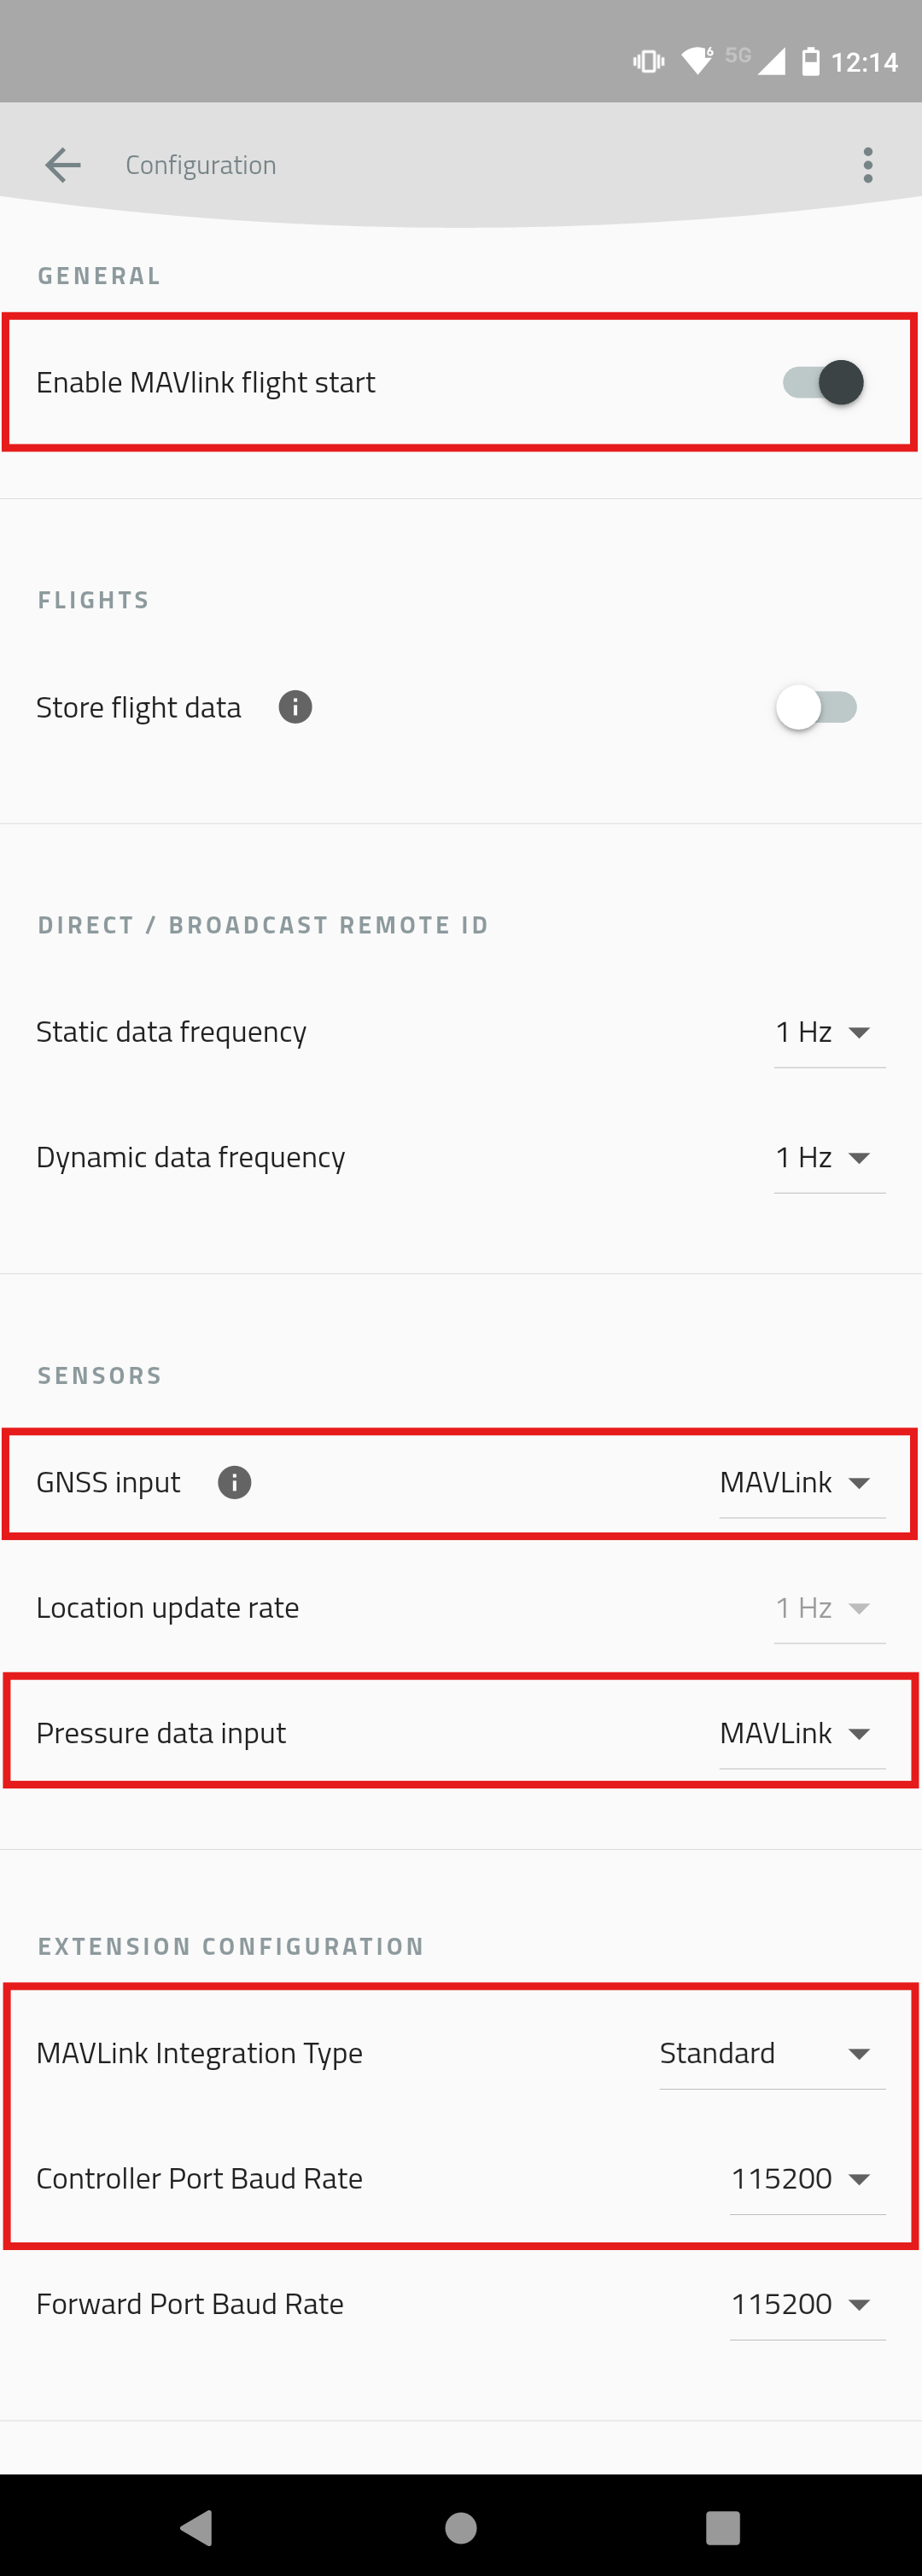
Check the settings of the highlighted items:
- Enable MAVLink flight start - True
- GNSS Input - MAVLink
- Pressure data input - MAVLink
- MAVLink Integration Type - Standard
- Controller Port Baud Rate - 115200
Check the settings of the highlighted items:
- Enable MAVLink flight start - True
- GNSS Input - MAVLink
- Pressure data input - MAVLink
- MAVLink Integration Type - OpenDroneID
- Controller Port Baud Rate - 115200


Next Steps
For Remote ID compliance in the EU, continue with Connect the Flight Controller to PC in the Integration in EU guide.
For Remote ID compliance in the US through retrofit using a Dronetag DRI module, continue with Connect the Flight Controller to PC in the Retrofit Integration in USA guide.
For Standard Drone ID compliance in the US for manufacturers, continue with Connect the Flight Controller to PC in the Standard Remote ID for Manufacturers in USA guide.