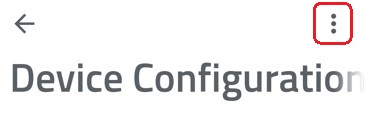
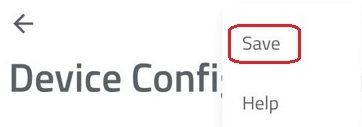
Configuration
The Mini is a highly customizable piece of hardware to suit your flight's needs. It allows you to configure various device parameters, which will help you optimize the performance and battery usage. Configuration is manageable in the Mobile app via Bluetooth.

- Flight auto-start is an option (enabled by default) that automatically initiates the flight when the device is ready for the flight (has GNSS fix and NRI/DRI is set). If you disable this option, a short button press in Flight Ready state is needed to start the flight manually.
- MAVLink flight control is an option (disabled by default) that takes care of starting/ending your flight based on the data sent on MAVLink protocol when EXT port is connected to MAVLink flight controller.
- Button flight control is an option (enabled by default) that controls whether Dronetag Mini button can be used for starting/ending the flight. Disable this option only if you think the button can be accidentally pressed by something inside the drone while it is in flight.
- USB Mode (disabled by default) ensures that the device operates in tandem with the drone's activation. It's crucial to enable this mode only when planning to connect the device directly to your drone and utilize the drone's power source to operate it. Activating USB Mode may affect the device's ability to undergo firmware updates while not connected to USB.
- LED Brightness adjusts the brightness level of the LED indicators.
- Auto Power Off interval defines the idle time (in minutes) after which the device will automatically shut down.
🆔 Entering Your Operator ID in the Dronetag App
Before you fly with your Dronetag device, you need to enter your Operator ID in the app. This ensures full compliance with Remote ID / UAS identification regulations in your region.
We support different formats and rules depending on the region you operate in: EU & Singapore, Japan, USA.
What is an Operator ID?
An Operator ID is a unique identifier issued to you (or your organisation) by your national aviation authority when you register as a drone operator.
- It identifies the operator, not just one drone.
- It must be displayed on each drone you operate and in many cases broadcast via Remote ID systems.
- You will enter this ID into the Dronetag app so that your device broadcasts the correct identifier.
- Where to get it? You register with your national authority (e.g., in the EU via your country’s CAA, in Japan via MLIT, in USA via FAA).
- EU: Register with your national CAA → receive your Operator ID. oaicite:0
- Japan: Register on the MLIT drone portal. oaicite:1
- USA: Register via FAA DroneZone. oaicite:2
- EU: Register with your national CAA → receive your Operator ID.
The format of the ID and whether you need to enter it depends on your region. Follow the section below for your specific region.
EU & Singapore
Format
- EU: Your Operator ID consists of two parts: a public part (16 alphanumeric characters) and a private/suffix part (often 3 characters) which you do not normally affix to your drone.
- Example public part:
CZEabc123def456 - Private suffix: e.g.
-xyz(used internally, not for display)
- Example public part:
- Singapore: Similar format (12-digit Operator ID issued via UA Portal) effective from 1 Dec 2025.
How to Enter into Dronetag App
- Open the Dronetag app.
- Go to Profile → My Devices → [Choose Your Device] → Remote ID set-up.
- Enter your 16-character public part (e.g.,
CZEabc123def456). - Do not enter the private suffix (e.g.,
-xyz) unless instructed. - Your Operator ID will be uploaded to the device and broadcast.
Where to Get the ID
- Register with the national aviation authority in your country (for EU resident) or via the UA Portal (for Singapore).
- Ensure the ID is visible on every drone you own.
Japan
Format
- A 15-character operator registration number issued by the Ministry of Land, Infrastructure, Transport and Tourism (MLIT) via the national UAS portal.
How to Enter into Dronetag App
- Open the Dronetag app.
- Go to Profile → My Devices → [Your Device] → Operator ID.
- Enter the full 15-character code as given by MLIT.
- Your Operator ID will be uploaded to the device and broadcast.
Where to Get the ID
- Register your drone/operator via Japan’s UAS registration portal.
USA
Format
- In the USA, you register as an operator with the Federal Aviation Administration (FAA) and receive a registration number. However — you typically do not need to separately enter an Operator ID in the Dronetag app for Remote ID purposes, since standard Remote ID drones broadcast the required info and the operator number is linked via the DroneZone system.
What to Do in the Dronetag App
- Since no extra Operator ID entry is required, simply ensure your drone is correctly registered with the FAA and that your device is Remote ID compliant.
Where to Get the ID
- Register via FAA DroneZone and obtain your operator registration number. Ensure your drone meets Remote ID rules.
- After entering your Operator ID, power on your device, go to the device details in the app, and check that the Operator ID is synchronised.
- Make sure that the ID you entered exactly matches the one issued by the authority (uppercase/lowercase, hyphens, etc.).
- Confirm the ID is visible on your drone (as required in your region).
- For the EU: Only the public part of the Operator ID is broadcast; keep the suffix/private part secure and do not share it.
- If unsure, check with your national aviation authority or your Dronetag supplier.
Flights
- Store flight data is an option (disabled by default) that automatically stores all flight data, such as duration, path and altitude directly on the device. The device has limited storage, so you should download your flight data regularly.
Network Remote ID
Network Remote ID broadcast service is enabled by default. If you want to turn this option off, navigate to Network Remote ID in Device Configuration and switch off the toggle, save the settings and restart the device.
This is a necessary step in case you decide to use Free subscription plan

- Telemetry aggregation coefficient specifies how many telemetry messages are aggregated into a single packet before sending it to the cloud. Therefore, it also determines how often telemetry messages are sent. E.g. if your GNSS update rate is set for 4 Hz and your aggregation coeff. has a value of 4, you will transmit telemetry each second containing four different telemetry messages. The recommended value is 1 with a 1 Hz GNSS update rate equivalent to one sent telemetry every second.
Direct Remote ID
- Static data frequency configures the frequency of the DRI messages containing takeoff location, UAS Operator ID, and Aircraft ID.
- Dynamic data frequency configures the frequency of the DRI messages with telemetry data.
- LTE Fallback Mode
- When enabled (default state), the device prioritizes continuous transmission of Direct / Broadcast Remote ID messages. If any issue occurs with the cellular or cloud connection, it will disconnect from the cloud and continue transmitting the Remote ID messages with the possibility to store telemetry data locally (if Flight Store enabled).
- When disabled, the device prioritizes maintaining a cloud connection - Network Remote ID. Connection issues may cause automatic restarts, which can temporarily interrupt transmission of Direct / Broadcast Remote ID messages and telemetry data recording.
Sensors
- GNSS input configures which GNSS receiver is used as an input for sending the NRI and DRI. Possible options are Internal for Dronetag Mini receiver, MAVLink for reading the data from MAVLink flight controller through EXT port, and Simulated for artificial simulated data for debugging/troubleshooting/testing purpose. Simulated must not be used for general use.
- Internal GNSS mode configures the mode of internal GNSS receiver. The Full power mode has about five times higher power consumption than the Power-saving mode. Therefore, it is recommended to use Full power mode only in challenging conditions where problems with GNSS fix occur.
- Location update rate configures the update and navigation rate of the GNSS receiver in Hz. A higher value means more up-to-date data for DRI/NRI but consumes more power. Thus 1 Hz is recommended for general use.
Device Inputs & Outputs
- External LTE antenna allows selecting internal or optional external LTE antenna.
- External Bluetooth antenna allows selecting internal or optional external Bluetooth antenna.
Cellular Connectivity
Settings in this section are country-specific and you shouldn’t change the values unless you know what you are doing. If you change the country, please tap on Configure network automatically and turn the device off and on to find the new cellular settings.
For more information about Dronetag cellular coverage and possible settings, visit this page. Contact the Dronetag team if you are unsure about your settings.