🔌 Connecting to the Scout
The Dronetag Scout features a built-in HTTPS management interface, accessible over your local network on port 443.
This interface allows you to:
- Preview detected data
- Configure network and system settings
- Manage the device securely
To access the interface, you must first determine the Scout’s IP address on your network.
🔍 Finding the Scout on Your Network
By default, the Scout is shipped with DHCP enabled. This means it will attempt to obtain an IP address automatically from your network's DHCP server.
If no DHCP server is found within a short timeout of 60 sec. period, the Scout will fall back to a static IP configuration:
- IP Address:
192.168.100.100/24 - Default Gateway:
192.168.100.1/24
You can connect a computer directly to the Scout via Ethernet and manually configure your computer’s network interface to a compatible IP address (e.g., 192.168.100.10) to access the device in fallback mode.
Important: The older Scout EVK model does not have the static IP Fallback, first you need to connect.
Important: The older Scout EVK model runs its management interface on port 8080, which is not secured with HTTPS.
We strongly recommend upgrading to the latest Scout hardware and firmware for improved security and features.
For specific details on upgrading your Scout EVK to the latest version, please refer to the Scout EVK Upgrade page.
When powered and connected (via Ethernet or Wi-Fi), the Scout will attempt to obtain an IP address via DHCP.
If you don’t know what IP address the Scout received, use one of the following methods depending on your platform:
- Android
- iOS
- Windows
- Linux
📱 Android – Bonjour Browser
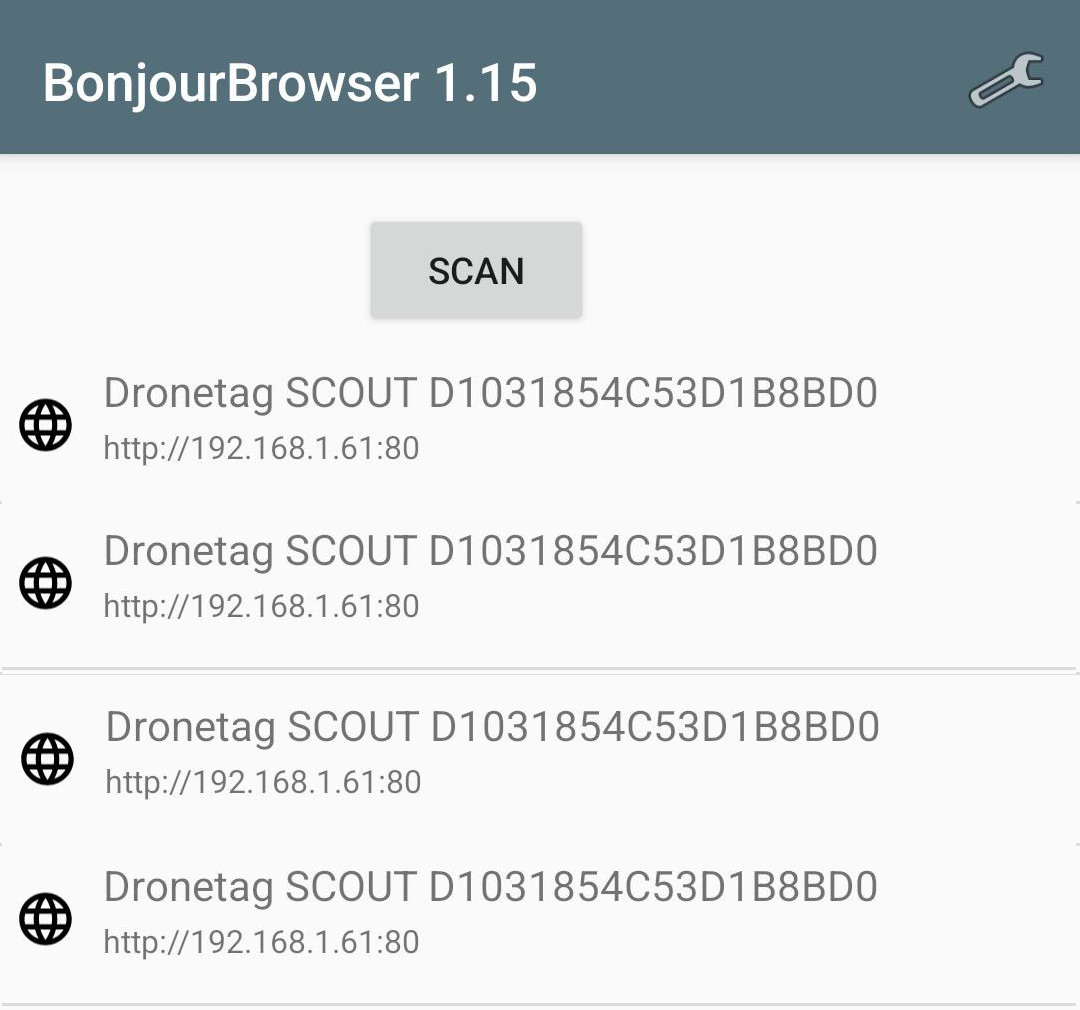
Download Bonjour Browser on Google Play

- Install and open the app.
- Locate Dronetag Scout in the list.
- The IP address and hostname will be shown.
📱 iOS – Flame Services Browser
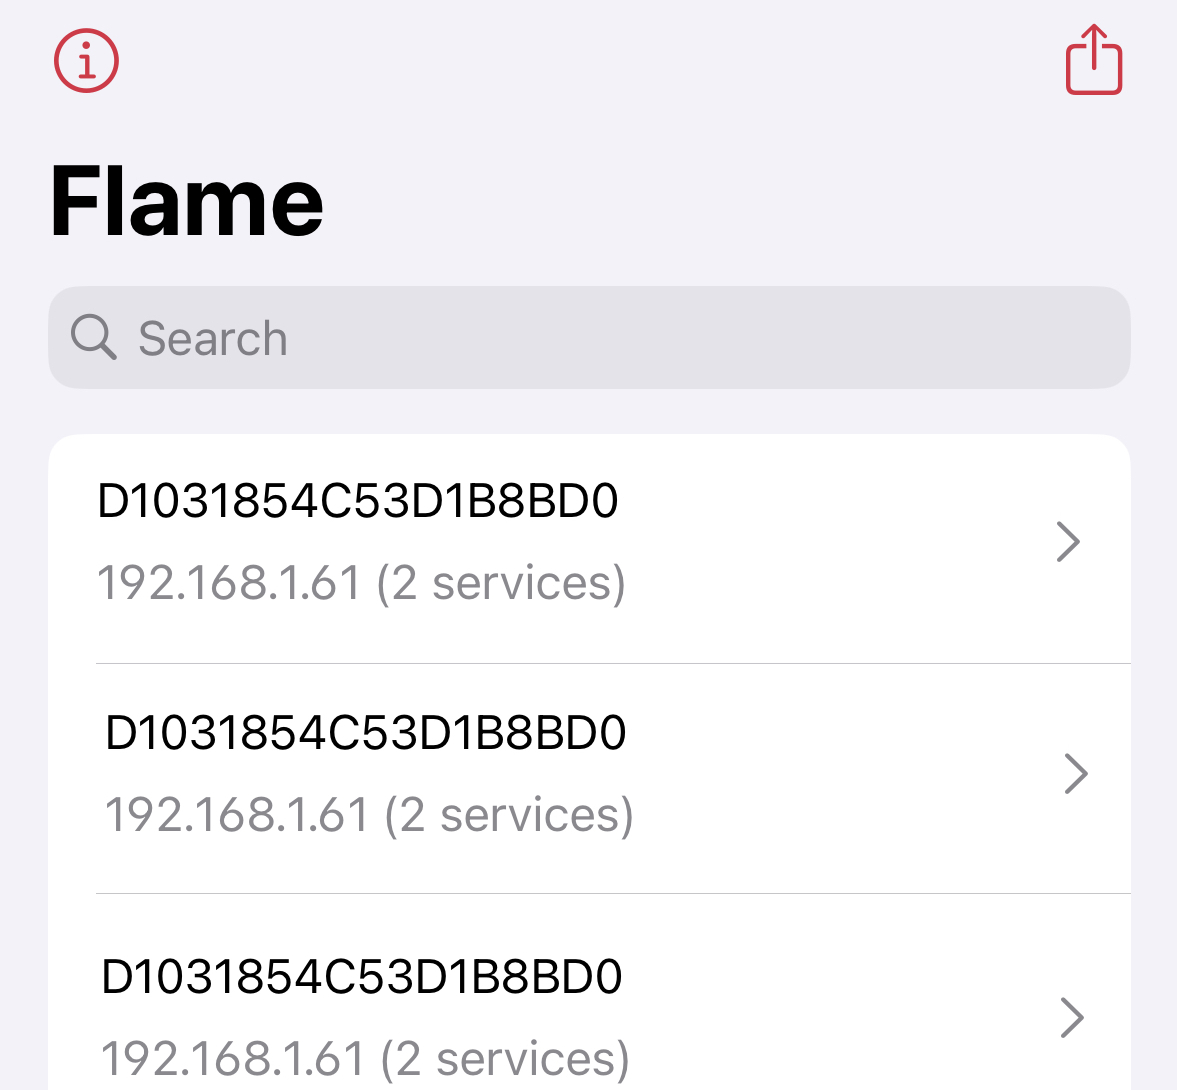
Download Flame Services Browser on App Store:

- Launch the app.
- Locate Dronetag Scout Serial number in the list.
- Find Dronetag Scout and note its IP address.
🪟 Windows – Bonjour Browser
Tool: Bonjour Browser
- Launch Bonjour Browser.
- Expand
_https._tcpsection. - Find the Dronetag Scout entry and view the IP address.
Ensure your firewall allows mDNS (UDP 5353) for discovery.
🐧 Linux – Using avahi-browse
Install Avahi utilities:
# On Debian/Ubuntu:
sudo apt install avahi-utils

# On Fedora:
sudo dnf install avahi-tools
Run the discovery command:
avahi-browse -rt _https._tcp

+ wlp0s20f3 IPv4 Dronetag SCOUT D1031854C53D1B8BD0             _https._tcp          local
= enp0s13f0u3u1 IPv4 Dronetag SCOUT D1031854C53D1B8BD0             _https._tcp          local
   hostname = [D1031854C53D1B8BD0.local]
   address = [192.168.1.61]
   port = [443]
   txt = []
Access the interface via browser:
https://192.168.1.61
🔐 Accessing the Interface
Once you have the Scout's IP address:
- Open a web browser.
- Navigate to:
https://<Scout-IP>(replace<Scout-IP>with the actual IP address, e.g.,https://192.168.1.42). - Because the Scout uses a self-signed certificate, your browser will likely show a security warning.
- Proceed by allowing the insecure connection. This may appear as "Advanced > Proceed to IP", depending on your browser.
- Log in using the default credentials provided by Dronetag Support.
The upgraded Scout includes a login-protected management UI. The default username and password will is on the sticker on the bottom part of each Scout.
Upon first login, please change the default credentials to a secure username and password known only to you.
Important: Write down your new credentials securely. If you perform a factory reset on the unit, it will revert to the default login credentials.
For the older Scout EVK model, the management interface runs on port 8080 and is not secured with HTTPS.
We strongly recommend upgrading to the latest Scout for improved security and functionality.
🔧 Configuring a Trusted Certificate
To avoid browser security warnings and enable a trusted HTTPS connection, you can configure the Scout with a certificate trusted by your system.
You can find certificate management options in the Configuration section of the interface.
Here, you can:
- Upload a certificate signed by your internal Certificate Authority (CA), or
- Generate a Certificate Signing Request (CSR) to obtain a signed certificate from your CA.
Once installed, the trusted certificate will replace the default self-signed one, ensuring seamless and secure access from trusted devices.
For the detailed description please refer to the system configuration page.
🛠️ Troubleshooting Connectivity
If you're unable to access the Scout’s interface refer to the detailed network troubleshooting section.