⚙️ System Configuration
Changing the Username and Password
To enhance your Scout's security, it is highly recommended to change the default login credentials.
-
Access the Management Interface
Navigate to the Scout’s management UI and go to the System tab. -
Authenticate with Current Password
You will need to enter the current password to authorize changes.- The unit itself has a label with the default password on the bottom of the device´s body, in case the packaging is lost.
- If necessary, you can perform the reset to factory defaults, which resets the password as well.
-
Set a New Password
Enter your new password twice to prevent typographical errors. -
Save the Changes
Click the Update Password button to apply the new credentials.
Don´t forget to store your new username and password securely. If you perform a factory reset, the login credentials will revert to the default values.
🔧 Configuring a Trusted Certificate
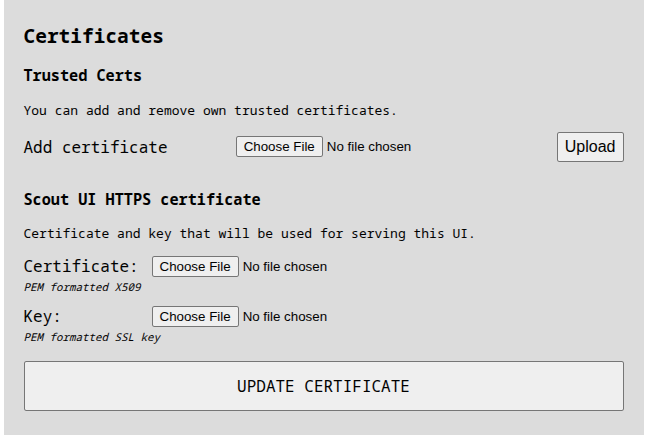
To avoid browser security warnings and enable a trusted HTTPS connection, you can configure the Scout with a certificate trusted by your system. You can manage certificates directly from the Configuration section of the Scout’s web interface. It provides the following options:
-
Add Certificate (CA Upload):
Upload a Certificate Authority (CA) certificate that will be added to the Scout’s internal trust store.
This is useful if your organization uses a private CA and you'd like to trust client certificates issued by it. -
Upload HTTPS Certificate and Private Key:
Use this to replace the default self-signed certificate with a certificate signed by your CA.
This will allow the Scout’s interface to be accessed via HTTPS without browser warnings, assuming the certificate is trusted by your local system.
🔄 Automatic Fallback to Self-Signed Certificate
If the uploaded HTTPS certificate becomes invalid or expires, the Scout will automatically regenerate a self-signed certificate.
This ensures that the device remains accessible via HTTPS, even if the trusted certificate can no longer be used.
Using trusted certificates is especially helpful when integrating the Scout into enterprise networks or accessing it from managed devices with strict security policies.
📡 Status Reporting (Heartbeat)
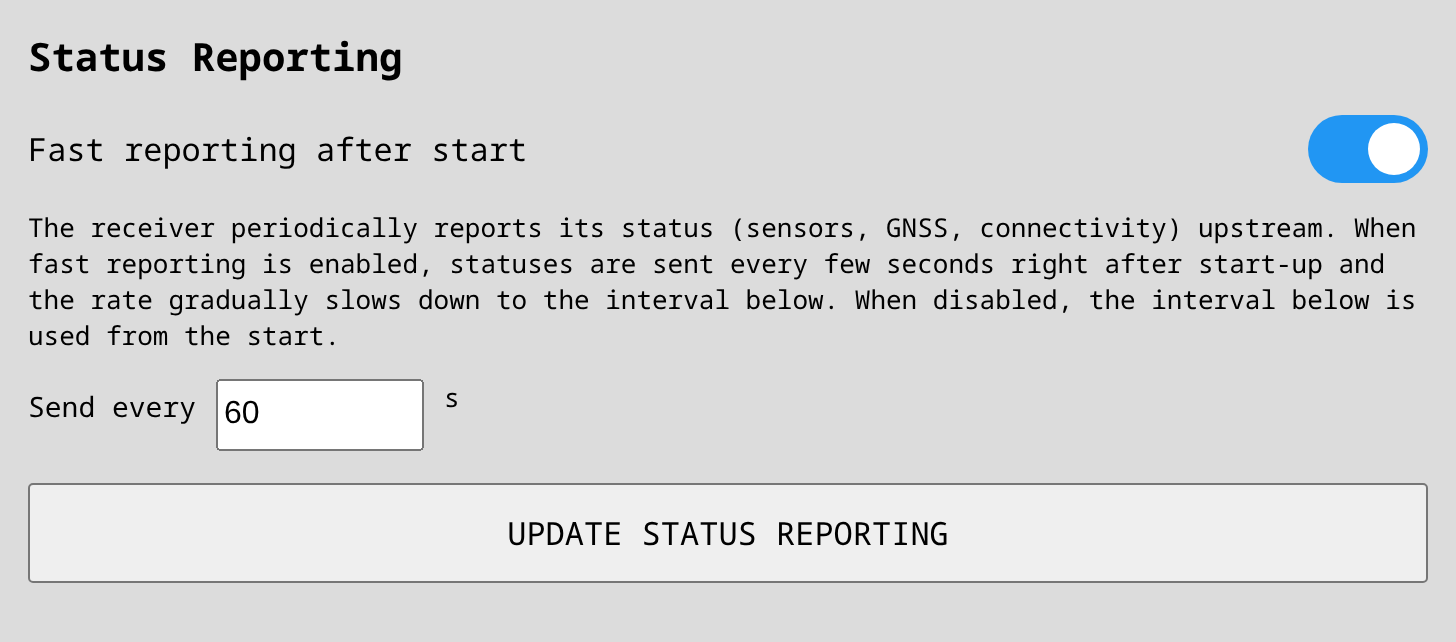
The Scout periodically sends a status message (heartbeat) describing its overall health: the number and state of its sensor modules, the time of the last detection, GNSS availability and position, and LTE modem state and signal quality.
The same status message feeds every connected service that subscribes to the status message source:
- Dronetag Cloud — keeps the sensor shown as online in the Drone Scanner app and the Dronetag Cloud.
- Advanced integrations that support status, such as TAK (the marker of the Scout itself), Sapient (sensor status reports), or Skydio (Marker for this Scout). See the Sensor+ configuration page for details on each integration.
⚙️ Configuring the Reporting Rate
You can adjust the reporting behavior in the System tab under Status Reporting:
- Fast reporting after start (enabled by default): right after start-up (or after a configuration change), status is first sent every 10 seconds and the rate gradually slows down until it reaches the interval below. This makes the Scout appear online promptly after installation or reboot while keeping the steady-state traffic low.
- Send every (default 60 s): the steady-state interval between status messages.
When Fast reporting after start is disabled, the configured interval is used from the very first message.
Keep the defaults unless you have a specific need. A shorter interval makes status changes (e.g. a sensor failure) visible sooner in all connected systems, at the cost of more traffic on a possibly metered LTE uplink. A longer interval saves data, but connected systems may consider the Scout offline if they expect more frequent status updates.
🛠️ System Maintenance Services
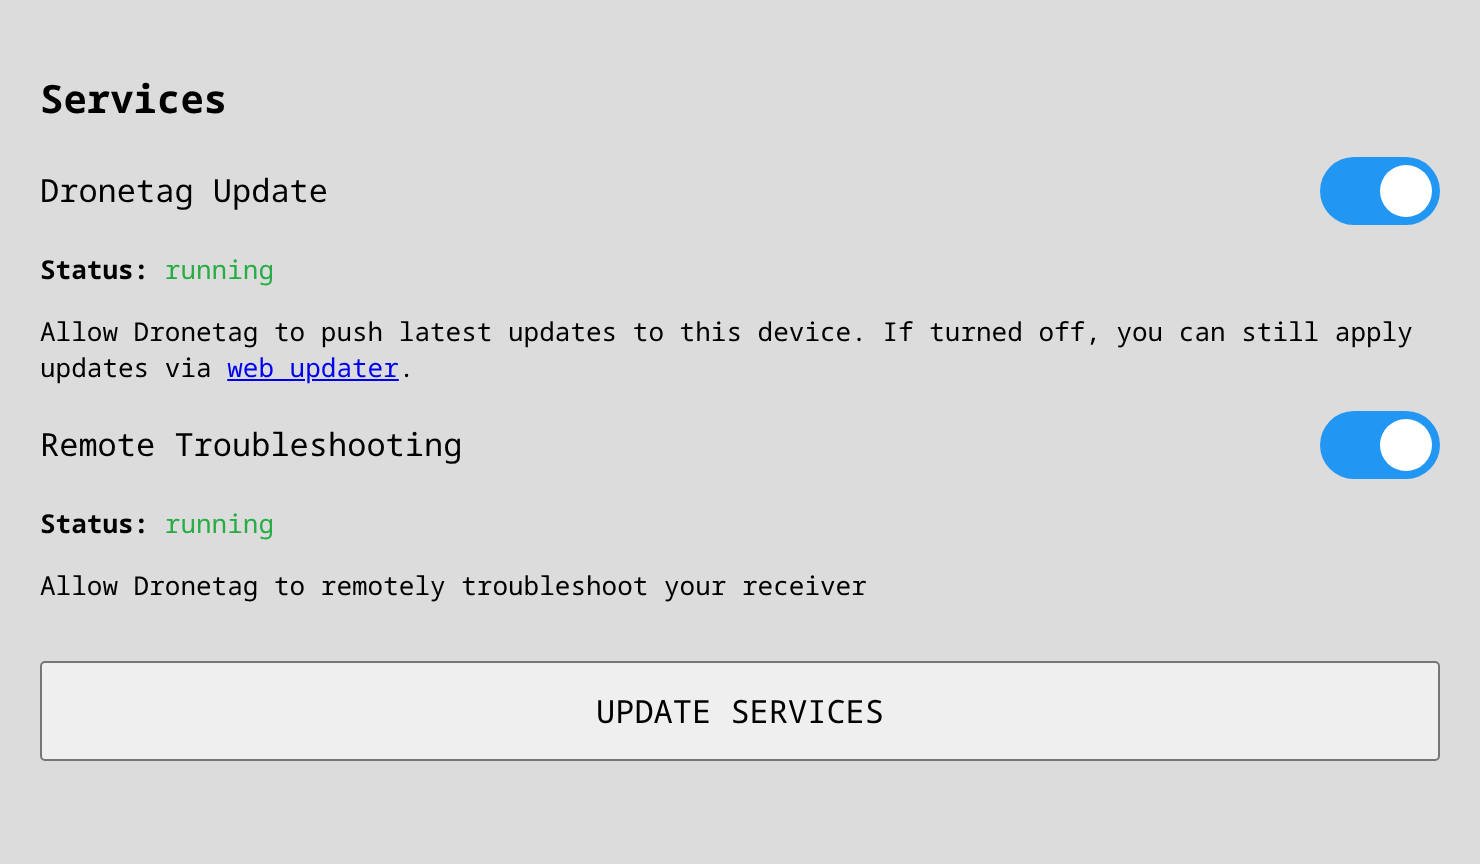
These services are not available on Scout EVK models.
Both following services operate only when the Scout is connected to our servers that handles these functions. They communicate securely via standard HTTPS connections, using asymmetric cryptography to ensure privacy and security. These services are accessible only by our team.
Dronetag Update Service
This service automatically updates the Scout whenever a new firmware release is available. It helps you to stay up to date with the latest features, improvements, and security patches we develop.
For more details about the automatic updates and how to perform manual firmware updates when the Dronetag Update service is off or no internet connection is available, please refer to the Firmware Update page.
Remote Troubleshooting Service
This service enables our support team to remotely connect to your Scout to help diagnose and resolve any issues you encounter. If users experience difficulty accessing the Scout's Ethernet port, remote troubleshooting via the 4G network connection can be utilized.
Control and Availability
Both services can be enabled or disabled according to your preference. We recommend disabling the Remote Troubleshooting Service once the Scout has been installed, since the most of the troubleshooting requests come during the Scout installation period.
Currently, these services are available on all Dronetag Scout devices, but in the future, they will only be included in the Scout Sensor+ package and in the Cloud Mode, due to infrastructure costs associated with maintaining these connections.
Statistics
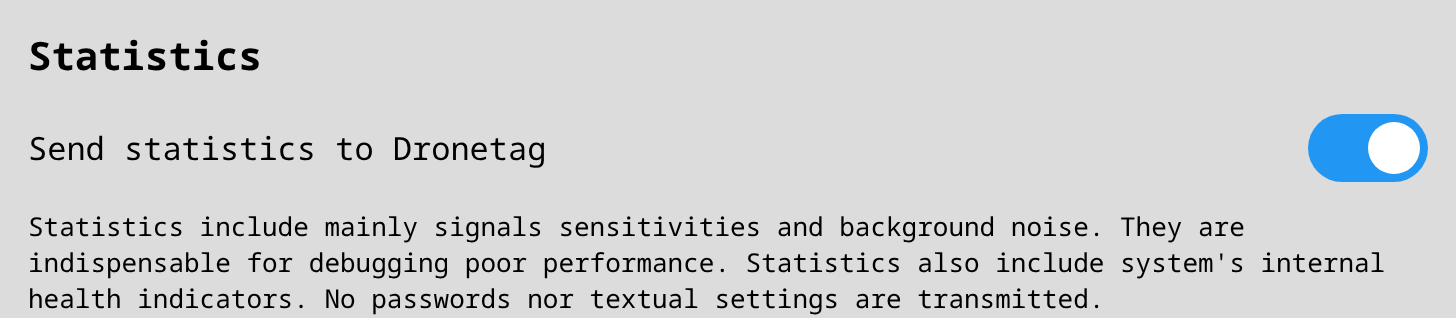
The Scout can send statistics to Dronetag. These are system statistics and reception-quality metrics — mainly signal sensitivities and background noise — together with the system's internal health indicators. They are indispensable for debugging poor reception performance.
Statistics contain no drone positions and not the sensor's own position, and no passwords or textual settings are transmitted.
Diagnostics
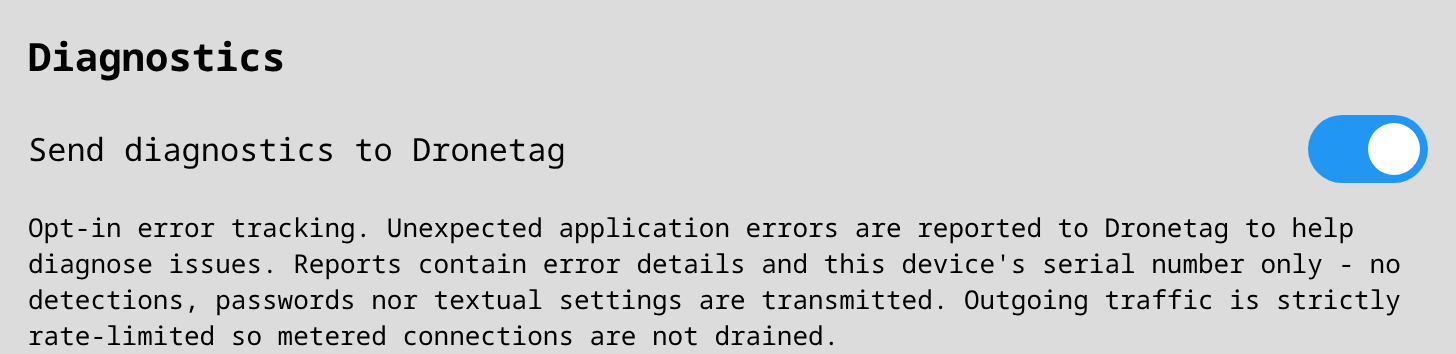
Send diagnostics to Dronetag is opt-in error tracking. When one of the services experiences an issue or error, the relevant information is sent to Dronetag to help diagnose it. A report includes the error details, partial logs, and this device's serial number.
Unlike Statistics, diagnostics reports include partial logs that may contain sensitive information, such as the position of the sensor or of detected drones. Outgoing traffic is strictly rate-limited so metered connections are not drained.
🔄 System Factory Reset
To restore your Scout device to its original factory settings, follow the instructions below.
This procedure will erase all local configuration, including network settings, APN, data privacy preferences, the password credentials (if updated), and custom changes.
ℹ️ Cloud registration is not erased — your Scout will remain linked to your Dronetag Cloud account.
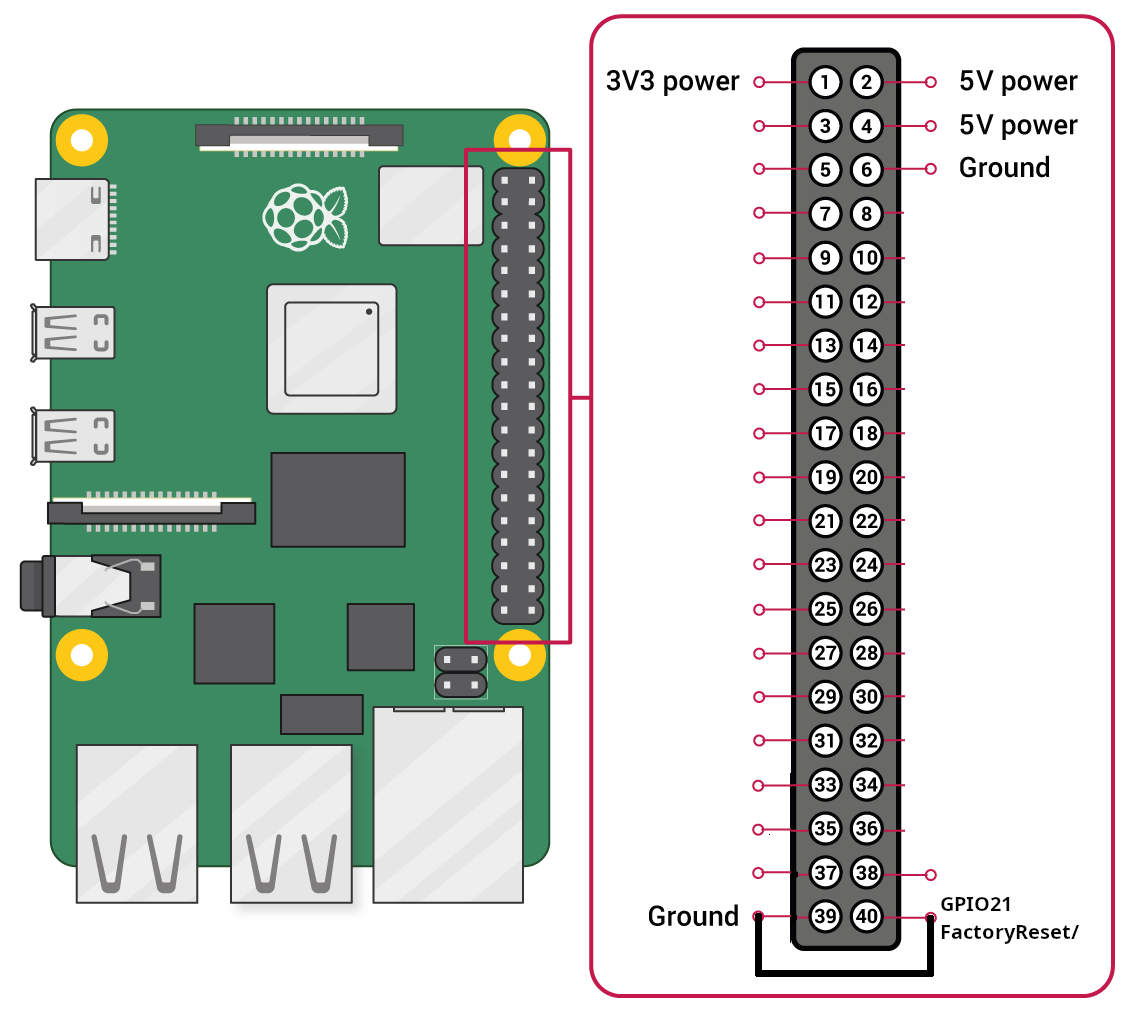
🛠️ Reset Instructions
-
Locate the GPIO pins labeled
Factory Reset (GPIO 21)andGNDon the Mini Computer board.
These two pins are directly next to each other. -
Connect the two pins using a jumper or a small conductive wire.
-
While the pins are connected, power on the Scout using the PoE injector.
-
Keep the pins connected and wait approximately 1 minute.
-
After the reset completes, remove the jumper and reboot the device if necessary.
-
To begin fresh setup after reset, see: 🔗 Scout Connection & Initial Configuration Guide
This factory reset procedure does not apply to the Scout EVK model.