Example: Install on VirtualBox
This section contains information that is no longer valid.
This guide provides an example of how to install the Dronetag On-Premise solution using Oracle VirtualBox. The steps are similar for other virtualization platforms, but the interface may vary slightly. We provide these steps as an example, as-is, and you may need to adapt them to your specific virtualization platform. This guide was written for Oracle VirtualBox version 7.1.10 (2025).
1. Import the OVF file
To import the OVF file into Oracle VirtualBox, follow these steps:
- Open Oracle VirtualBox.
- Go to
File>Import Appliance. - Select the
dronetag-onpremise*.ovffile from the distribution package. - Click
Nextand review the appliance settings. - Click
Importto start the import process.
or use this command:
VBoxManage import --vsys 0 --vmname "dronetag-onprem" dronetag-onpremise*.ovf
2. Configure the machine settings
After the OVF file is imported, you may want to review and adjust the machine settings.
You can use the defaults settings, but you will need to adjust the network settings to ensure the virtual machine can communicate with your host machine and the rest of your network.
- Select the imported virtual machine in VirtualBox.
- Click on
Settings. - Make sure you're in the "Expert" mode, not "Basic" mode.
- Go to the
Networktab.
Now choose one of the following options for networking:
2.1. Use NAT
- Ensure the network adapter is set to
NAT. - Click on
Port Forwarding. - Add the following port forwarding rules, set protocol to
TCP, host IP to127.0.0.1(or leave it empty for all interfaces), and host port to the desired port on your host machine:22- SSH port to access the virtual machine over SSH80- HTTP port for the web interface
- Click
OKto save the settings.
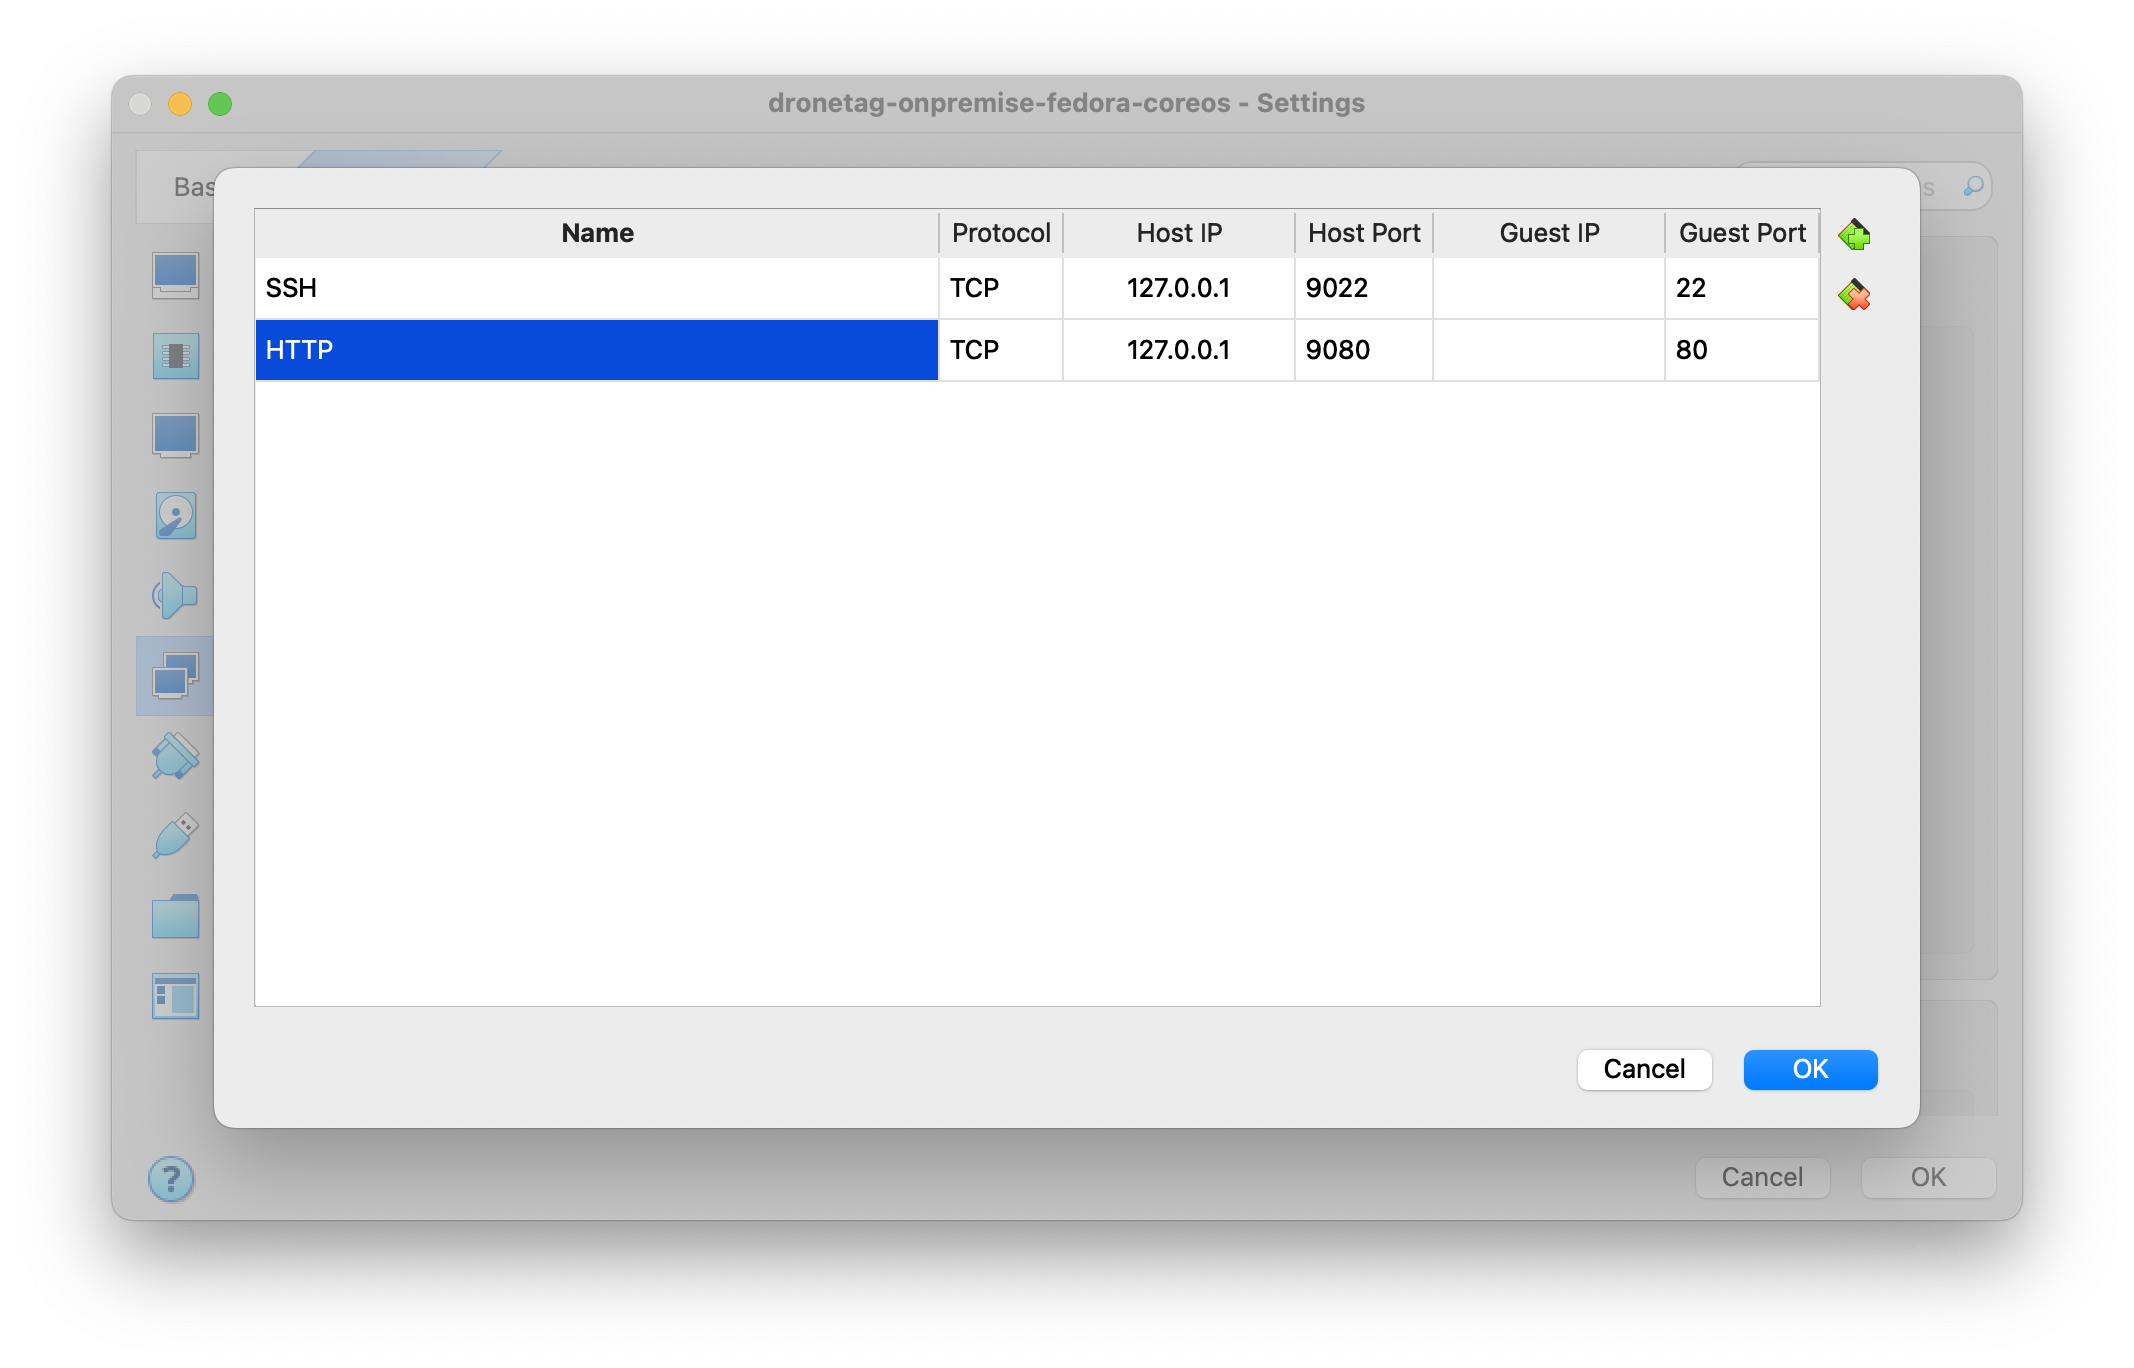
or configure using the command line:
VBoxManage modifyvm "dronetag-onprem" --natpf1 "guestssh,tcp,,9022,,22"
VBoxManage modifyvm "dronetag-onprem" --natpf1 "guesthttp,tcp,,9080,,80"
2.2 Use Bridged Adapter
- Ensure the network adapter is set to
Bridged Adapter. - Select the network interface of your host machine that is connected to your local network.
- Click
OKto save the settings.
or configure using the command line:
VBoxManage modifyvm "dronetag-onprem" --nic1 bridged --bridgedadapter1 "<your adapter>"
3. Start the virtual machine
- Select the imported virtual machine in VirtualBox.
- Click on
Startto boot the virtual machine.
or use this command:
VBoxManage startvm "dronetag-onprem"