Retrofit Integration in the EU
This guide walks through the steps required to retrofit an existing drone with a Dronetag DRI to meet the requirements for Direct Remote Identification for drones in the Open category and Specific category in the EU. This guide does not describe integration as part of compliance with the C class for manufacturers.
Requirements
Make sure you have:
- Operator ID serial number (ANSI/CTA-2063-A format)
- Dronetag DRI module (recommended: U.FL antenna variant)
- Compatible antenna for the U.FL variant. The small testing antenna is included with a Dronetag DRI.
We recommend choosing a pre-approved antenna from our approved list of antennas. - Compatible cable to connect the DRI module to your flight controller. The example cable is included with a Dronetag DRI.
- Flight controller (e.g., Pixhawk or ArduPilot) installed in the drone.
- Tools to securely mount the DRI module to your drone: 3M Dual Lock / strong adhesive tape / Velcro or M2 screw.
- Smartphone supporting BLE 5.0 (for broadcast verification).
Required MAVLink messages
When used as a retrofit Remote ID for legacy drones, the Dronetag DRI composes Remote ID messages itself. The Operator ID is configured in the Dronetag App and stored in the device. However, the module still requires the following MAVLink messages from the flight controller to build valid RID broadcasts:
- MAVLINK_MSG_ID_ALTITUDE – altitude (PX4: pressure altitude).
- MAVLINK_MSG_ID_SCALED_PRESSURE – barometric pressure data.
- MAVLINK_MSG_ID_GPS_RAW_INT – GNSS position.
- MAVLINK_MSG_ID_SYSTEM_TIME – system time reference.
- MAVLINK_MSG_ID_GLOBAL_POSITION_INT – global position.
- MAVLINK_MSG_ID_HEARTBEAT – system status.
Step-by-Step Integration Guide
Mount the DRI on the Drone
- Look at your drone and find a suitable place for secure installation of the DRI module:
- DRI module with integrated antenna should be placed away from conductive materials like metal or carbon fiber.
- DRI module with U.FL antenna can be mounted on any material, but the antenna should not be covered with any conductive material like metal or carbon fiber.
- With a DRI module with U.FL antenna: position and secure the antenna in a place where it can freely transmit and receive signals.
- Use screws or adhesive tape to secure the DRI module to your drone.
- The DRI module should be mounted firmly and securely so it will not move during future flights.
- Look at your drone and find a suitable place for secure installation of the DRI module:
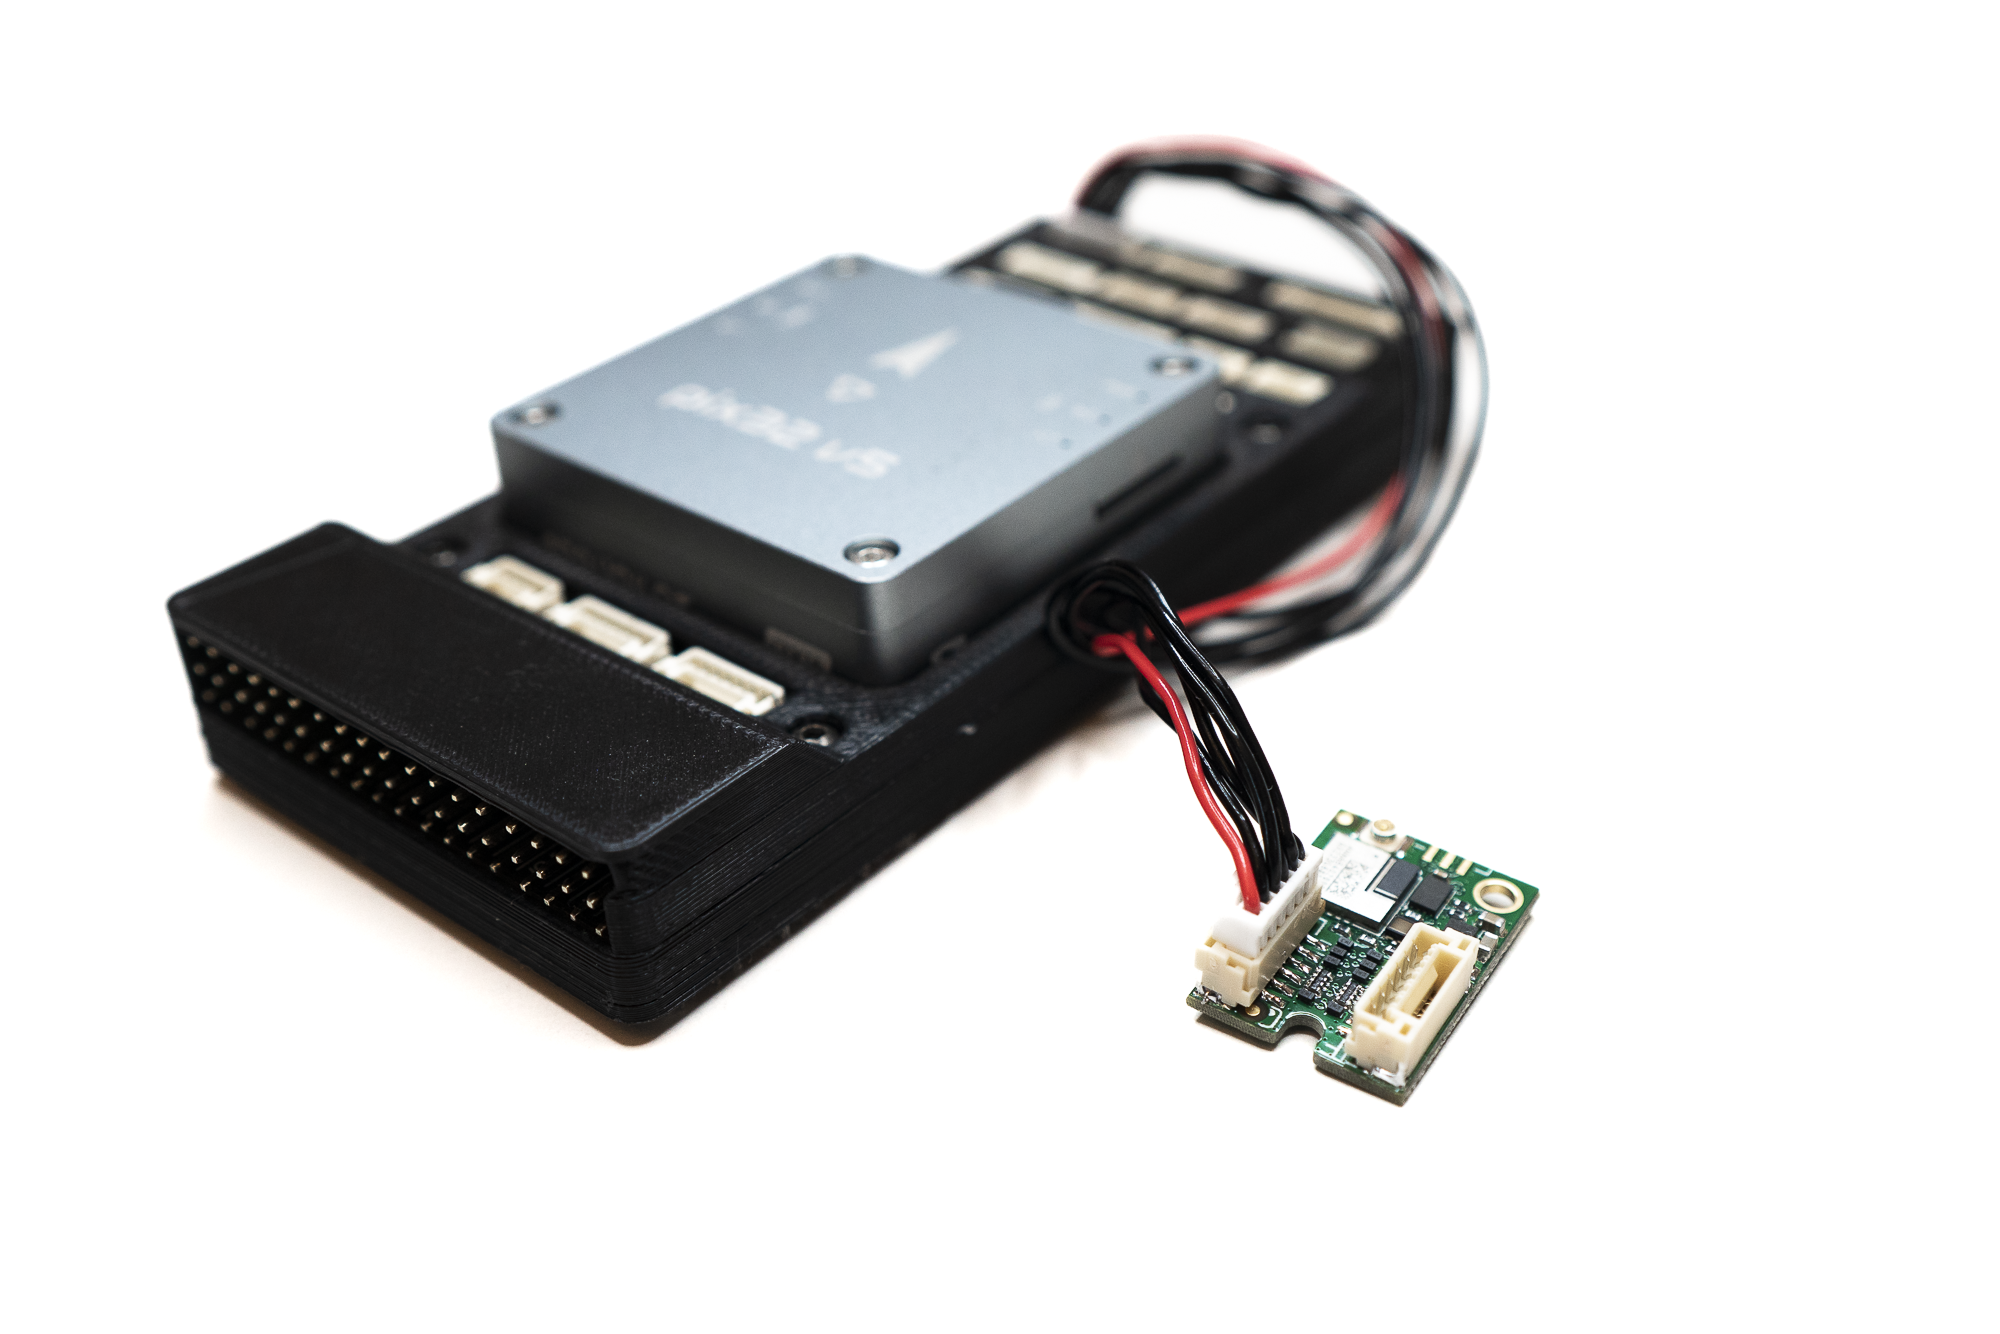
Connect DRI to Flight Controller
- Using the included cable or your custom cable, connect the DRI module and the flight controller:
- On the DRI module, choose Flight Controller port (Port C)
- On the flight controller, choose any unused telemetry port or serial interface port
- Please note the number of the telemetry/serial port to which you connected the DRI. It will be needed later.
noteFrom now on, we will demonstrate the guide steps on a Holybro Pix32 v5 flight controller as a reference.
The guide steps are identical or very similar for any other compatible flight controller.warningFollow the manufacturer's documentation for your flight controller to decide where you should connect your DRI module.
- Using the included cable or your custom cable, connect the DRI module and the flight controller:
Power On and Check LED Indicators
-
Power on the drone and check the DRI status:
- Yellow LED → Indicates basic power-up and standby. This is the expected state for a brand-new Dronetag DRI.
- Green LED → DRI is ready for takeoff. This means the DRI is already configured, and you should verify that the rest of the configuration is correct.
- If the LED occasionally flashes red, you may continue with the configuration. This can indicate a temporary mismatch between the configuration of the flight controller and the DRI, which will be resolved in the following steps.
-
See the LED indicator reference for the full color guide.
noteFor correct interpretation of the LED status, always check the indicator from a direct viewing angle.
When viewed from the side, the internal construction of the RGB LED may partially obscure one of its elements, which can make the color appear different.-
Configure DRI via Mobile App
If you are doing this for the first time, see the detailed walkthrough: DRI Configuration
- Use one of the supported mobile apps:
- Open the Dronetag Toolbox app.
- Select your DRI device from the device list.
- On the Identification screen, select the US identification and save.
- On the Configuration screen, check the following settings:
- Enable MAVLink flight start – True
- GNSS Input – MAVLink
- Pressure data input – MAVLink
- MAVLink Integration Type – Standard
- Controller Port Baud Rate – 115200
Connect the Flight Controller to PC
If you are doing this for the first time, see the detailed walkthrough: Connect to Flight Controller
A USB connection is the fastest and most reliable method to configure the flight controller. The alternative is to use a SiK Telemetry connection, which is slower than USB connection, so be patient.
SiK TelemetryConnection using a SiK telemetry radio does not require a physical connection between the flight controller and PC, but it is much slower to work with than the USB method. How to use the Holybro SiK radio is described on the page Holybro SiK Radio V3 documentation.
SiK Telemetry warningIf you decide to connect a SiK Telemetry through the Port-Forwarding feature of the DRI, do not connect RTS/CTS lines between the DRI and the SiK radio.
Configure the Flight Controller
If you are doing this for the first time, see the detailed walkthrough: Flight Controller Setup
In your favorite configuration software for Flight Controller:
- Assign the correct serial port for the DRI in the FC parameters (symbol x in parameter names below). Use the noted number of the telemetry/serial port from the previous step:
SERIALx_PROTOCOL = MAVLink
- Set the serial port baud rate to 115200:
SERIALx_BAUD = 115200
- Turn off serial port flow control:
BRDSERx_RTSCTS = 0
Do you want more functions?If you want to use OpenDroneID with full integration (e.g., pre-flight checks, GNSS fix enforcement), check the Full Integration in USA.
- Assign the correct serial port for the DRI in the FC parameters (symbol x in parameter names below). Use the noted number of the telemetry/serial port from the previous step:
Confirm LED Status After FC Configuration
- Check the DRI status:
- Green LED → DRI is receiving valid MAVLink data and is ready for takeoff
- **Yellow LED ** - Please check if your drone has GNSS lock.
- Red LED → Please check the cable connection between DRI and flight controller and ensure it is properly plugged in.
- See the LED indicator reference for the full color guide
noteFor correct interpretation of the LED status, always check the indicator from a direct viewing angle.
When viewed from the side, the internal construction of the RGB LED may partially obscure one of its elements, which can make the color appear different.- Check the DRI status:
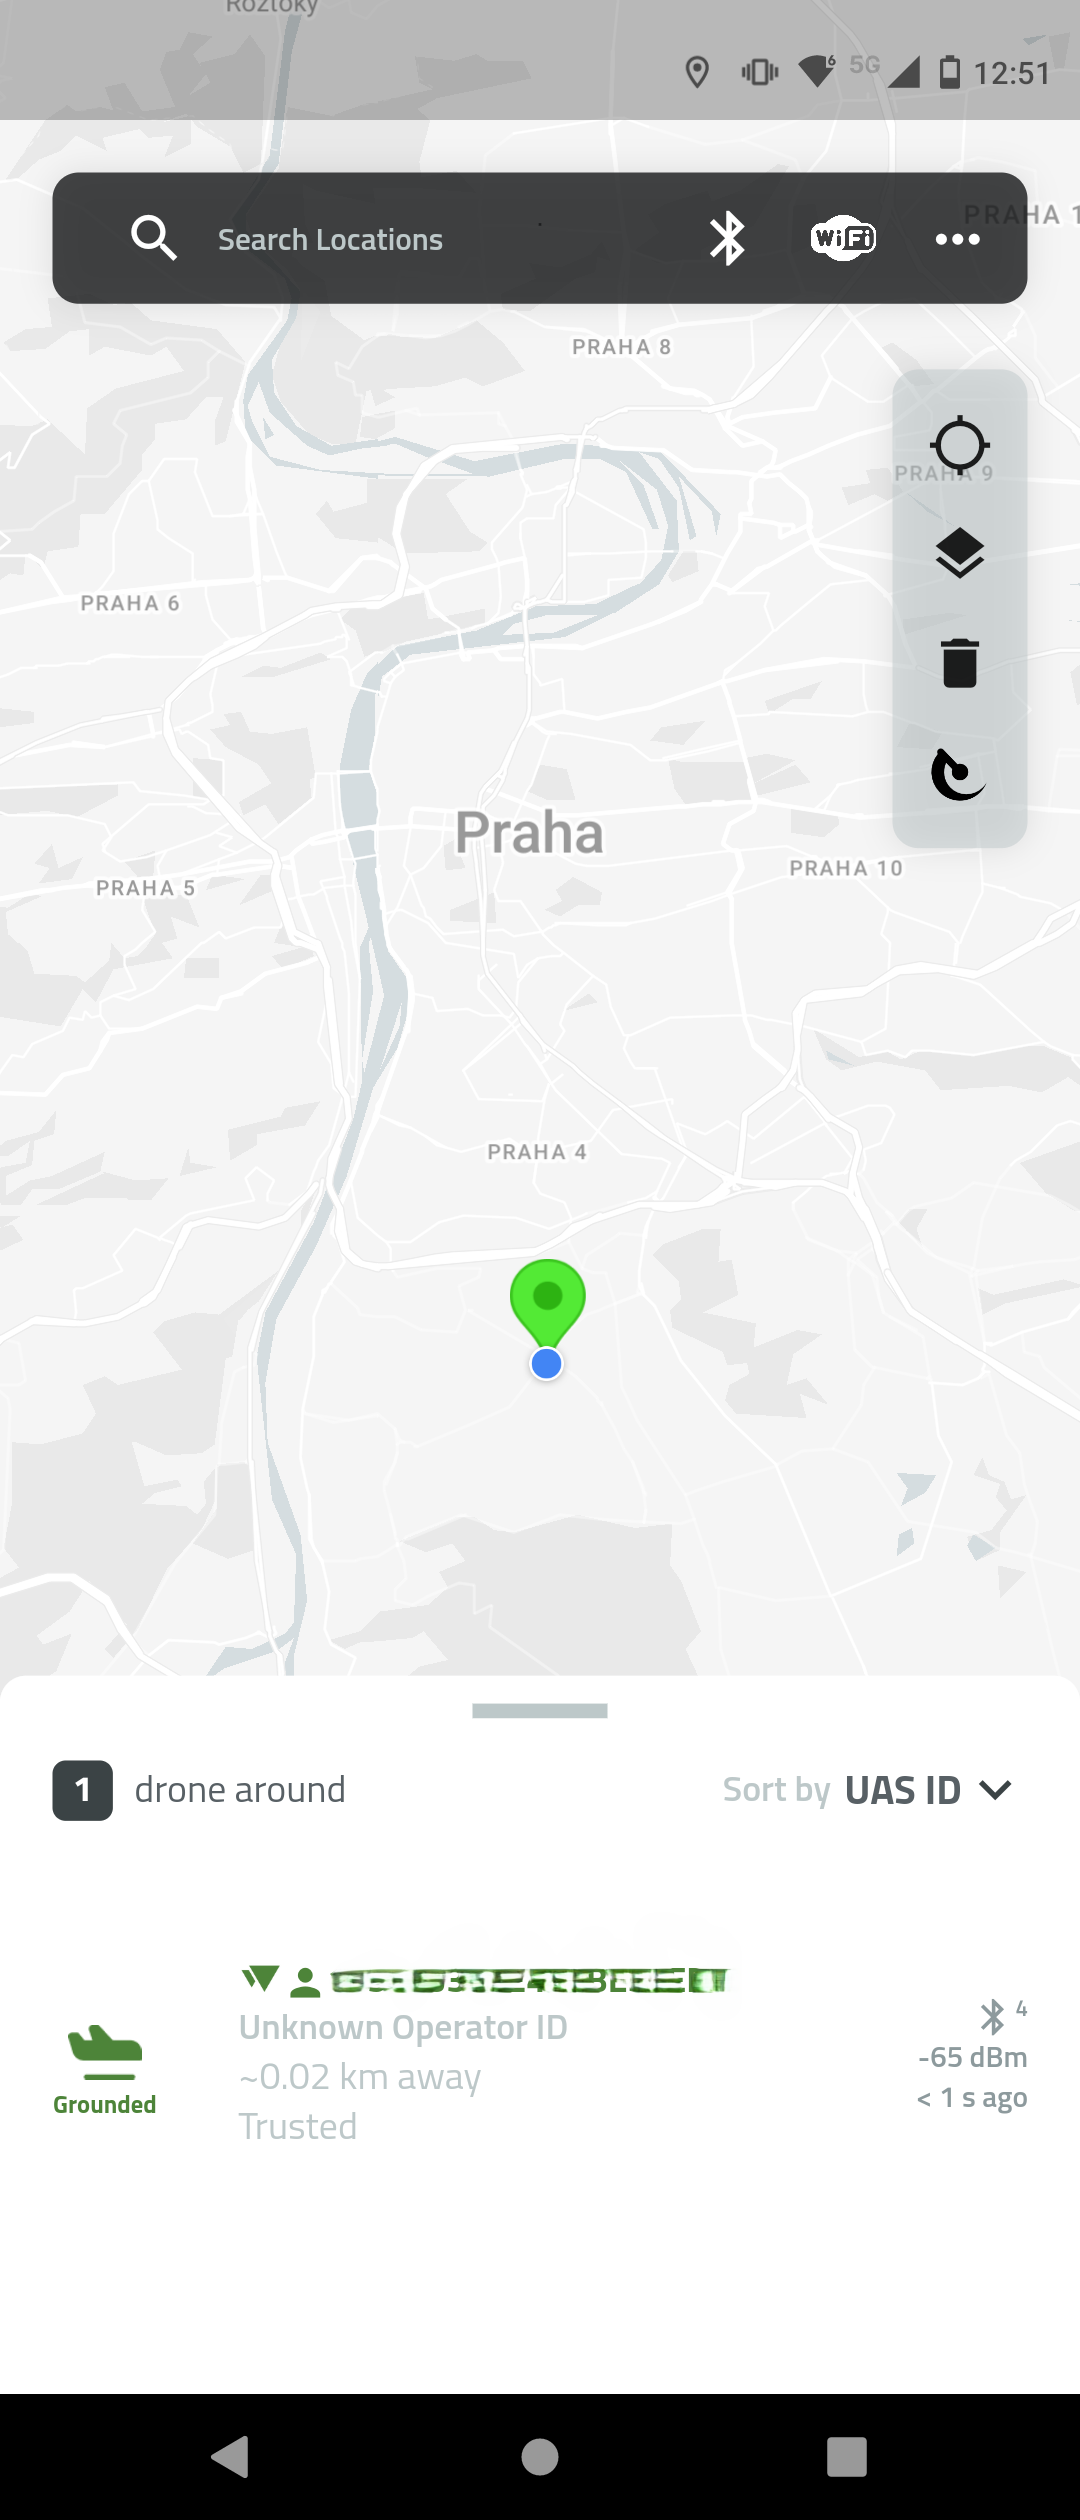
Verify Broadcast in Mobile App
-
Use the Dronetag DroneScanner app on a BLE 5.0-capable device:
-
Confirm the transmission of Remote ID data:
- Serial number
- Drone location
- Timestamp
- Operator info (if applicable)
-
Done
At this point your Dronetag DRI is correctly installed and broadcasting your UAS Operator Registration Number.
This satisfies the EASA Remote ID requirement for legacy drones without C‑class marking.
The DRI module satisfies the remote identification requirement where applicable, but it does not grant permission for A2 or Specific category by itself. You must still meet pilot competency, drone class/marking, and (for Specific) hold an authorization or operate under STS conditions.
For complete EU rules and guidance, see the official EASA page: EASA – Civil Drones
Preflight Checklist
- Operator ID: UAS Operator Registration Number is valid and entered in the Dronetag App.
- DRI module: Properly mounted, powered, and antenna connected.
- Broadcast check: Remote ID signal verified in the Dronetag App before takeoff.
- GNSS lock: GPS fix acquired; position data is valid.
- Airspace & limits: Flight planned within EU rules (VLOS, max 120 m AGL, local restrictions).
- Pilot competency: Required training completed (A1/A3; STS/OA if applicable).