Mounting
Choose the right location
- A suitable location must be identified for the receiver installation.
- The performance of the receiver depends on having an unobstructed view of the surroundings.
- A rooftop, preferably the tallest in the vicinity, often serves as an ideal installation site.
For the best range performance of the Scout, do not mount it too close to any signal transmitter with 2.4 GHz or 5 GHz frequency.
Step-by-Step Guide: Mount the Device
- To ensure optimal performance, the receiver should be mounted on an elevated structure like an existing pole, bracket, or mast.
- If no such structure is available, a tripod can be used.
Mount the device to the desired place. Remember, that the higher the place is, the better Scout will receive Remote ID signal coming from the drones. While mounting the Scout, stick with the mounting manual and strictly follow the local regulation for electrical installation and surge and lightning protection.
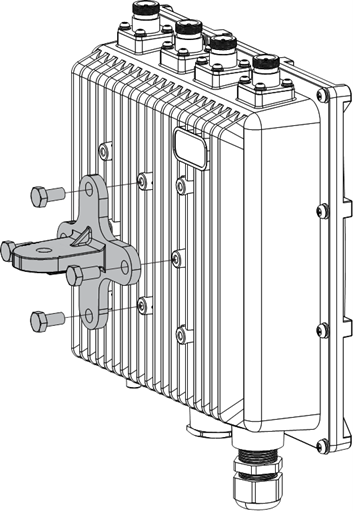
A. Fix the included cross bracket on the bottom of the enclosure with four (4) M6*12 bolts.
B. Place two (2) pieces of the clamp around the pole and tighten them with the included M6*110 bolts, washers, and nuts.
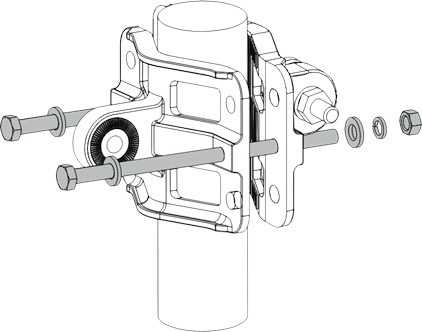
C. Connect the pole clamp (for 45 – 110 mm diameter of pole) and the cross bracket by securing the last piece of the mounting kit in place using M6*30 bolts, washers, and nuts.
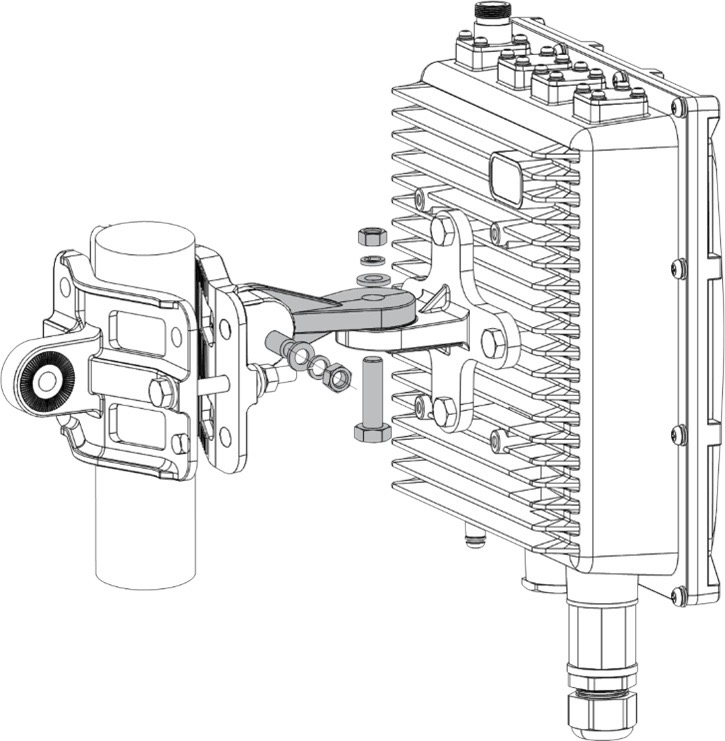
The Scout must be fixed so that antennas point perpendicular to the horizontal line.
Mount the Antennas
A. Screw the antenna marked with "1" sticker on its box to the connector marked with the same sticker (the longer antenna has to be mounted on the left side of the device from the front view).
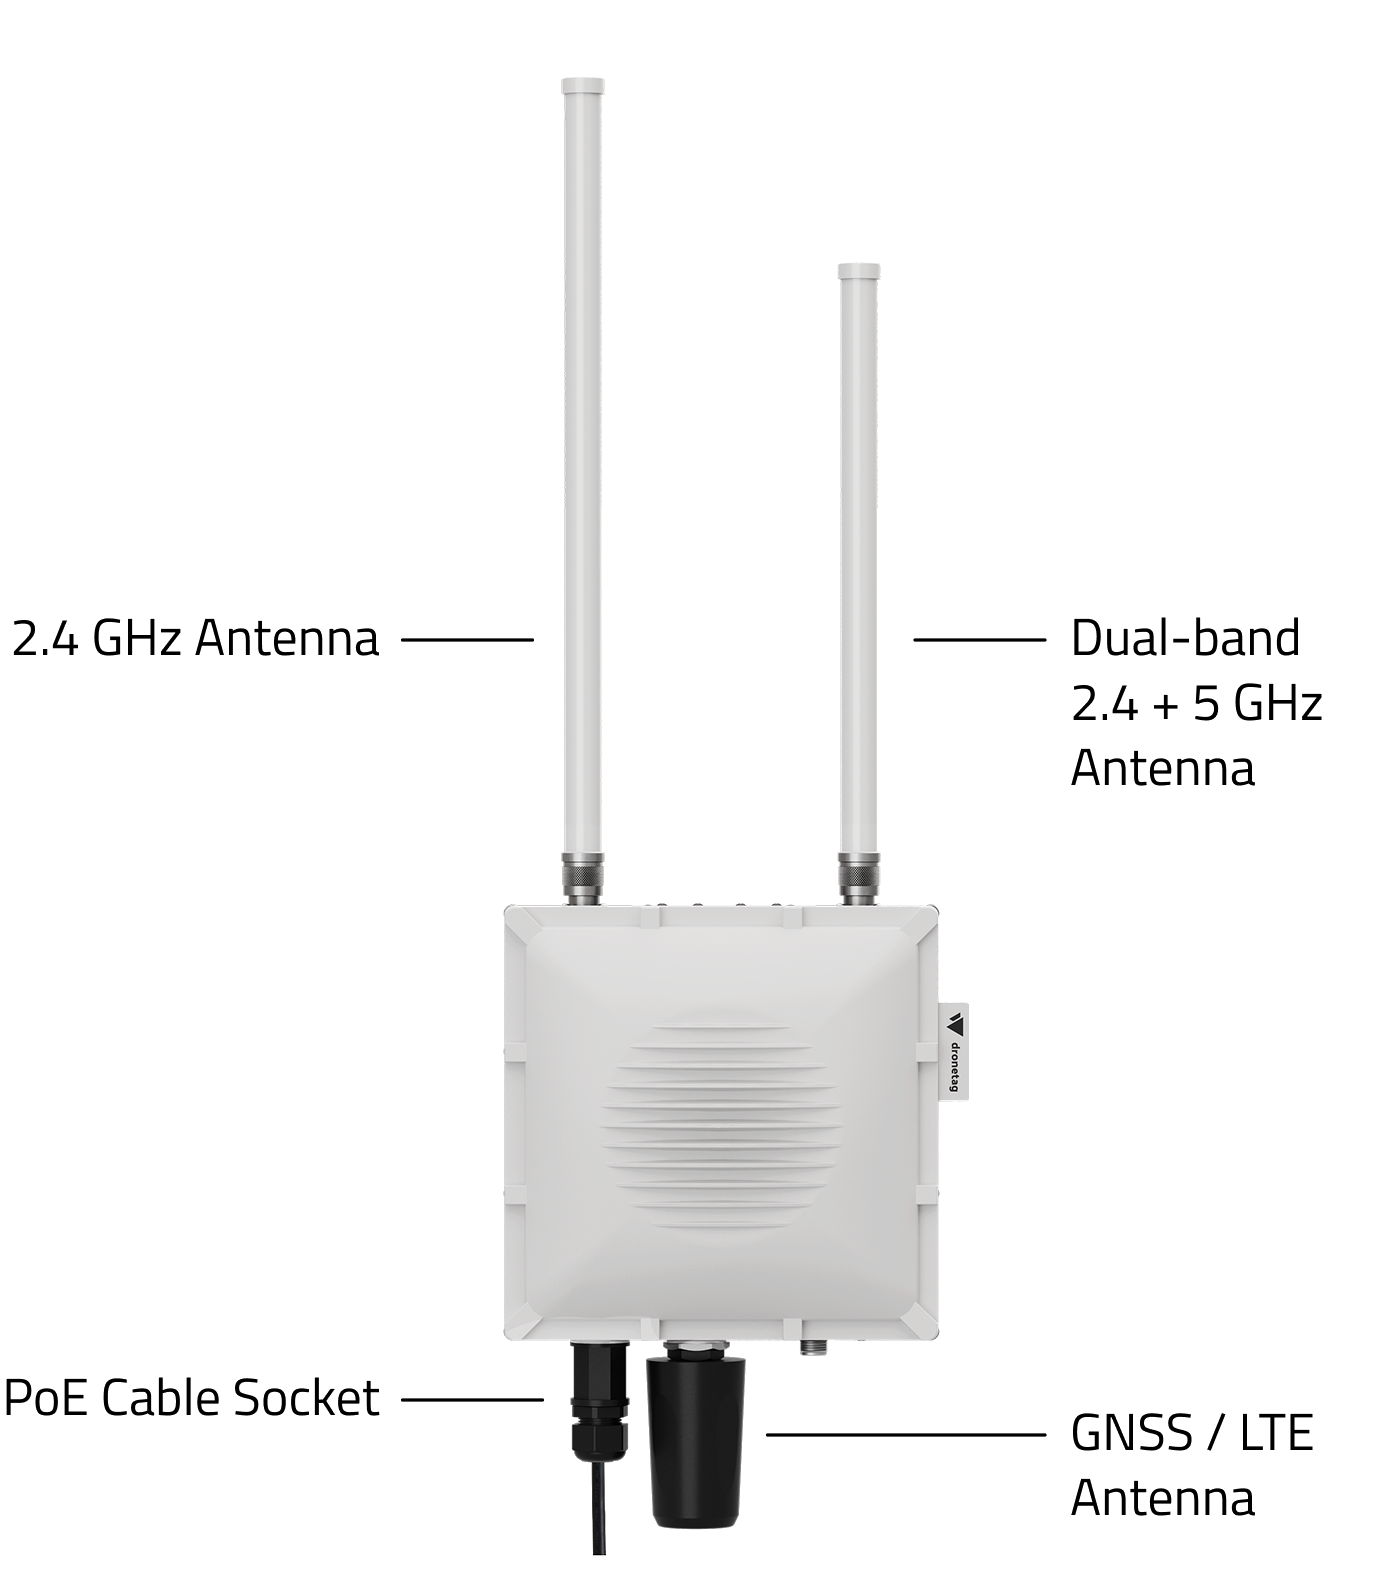
B. Screw the antenna marked with "4" sticker on its box to the connector marked with the same sticker (the shorter antenna has to be mounted on the right side of the device from the front view)
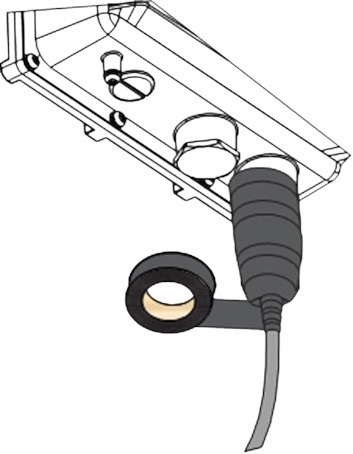
C. Cut off about 50 cm waterproof tape. Stretch it to double the length. Wrap three layers around the connector with a 50% overlap. Hold the tape in place with your hand for a few seconds.
D. Wrap three additional layers with PVC tape with natural uncoiling force and a 50% overlap. Make sure to cover the head and the tail of the connector.
Connect the PoE cable
Use only CAT5 (or above) cabling with outdoor rating.
- The non-LTE version of Scout receiver must be constantly connected to an internet router for data transmission to the Dronetag Cloud when used in Cloud Mode.
- The Scout must be connected to the same network as the computer used to perform the initial configuration.
The receiver is designed for outdoor use, housed in a weather-resistant case. The Ethernet cable must be threaded through a cable gland and crimped inside for a secure connection.
Please note that you will need the ability to crimp your own Ethernet cable with RJ-45 connector for any setup and connection.
Connect the ethernet cable using the PoE injector.
Don´t forget to use appropriate cable for outdoor use. After the PoE cable is connected, insulate it with included PVC tape:
- Clean the surface area of the connector that will be wrapped. Wrap a layer of PVC tape with a 50% overlap according to the rotation direction of the connector. Continue wrapping the PVC tape to about 10 mm below the end of the connector.
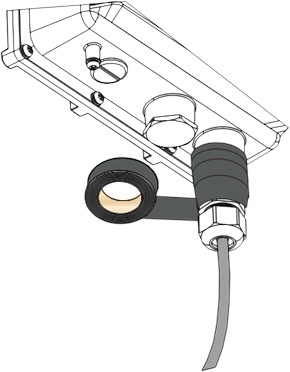
- Wrap three additional layers with PVC tape with natural uncoiling force and a 50% overlap. Make sure to cover the head and the tail of the connector.